How do I create and manage multiple views in Scompler?
Create custom views and get a better overview of your activities in Scompler.

You can customise views in almost all areas of Scompler, so that you can see exactly the information you need. Save the most important views to access the content you want and work more efficiently.
You can use different filters to configure your view, change the appearance and display the stories, articles, topics and tasks you want to see.
Create a view
It is very easy to create a view or share saved views with your team to be able to access them every time you log in to Scompler. Views can be created using the filters and settings in the following sections: Topics - also in each of the submenu items -, Calendar and Content.
The filters in Scompler are designed to help you quickly create a detailed overview. You will find the filters at the top and under the navigation bar in every section. To create a new view, first, click on "Add Filter" to select the filters you need. You can activate them by clicking on each one and selecting the desired categories.
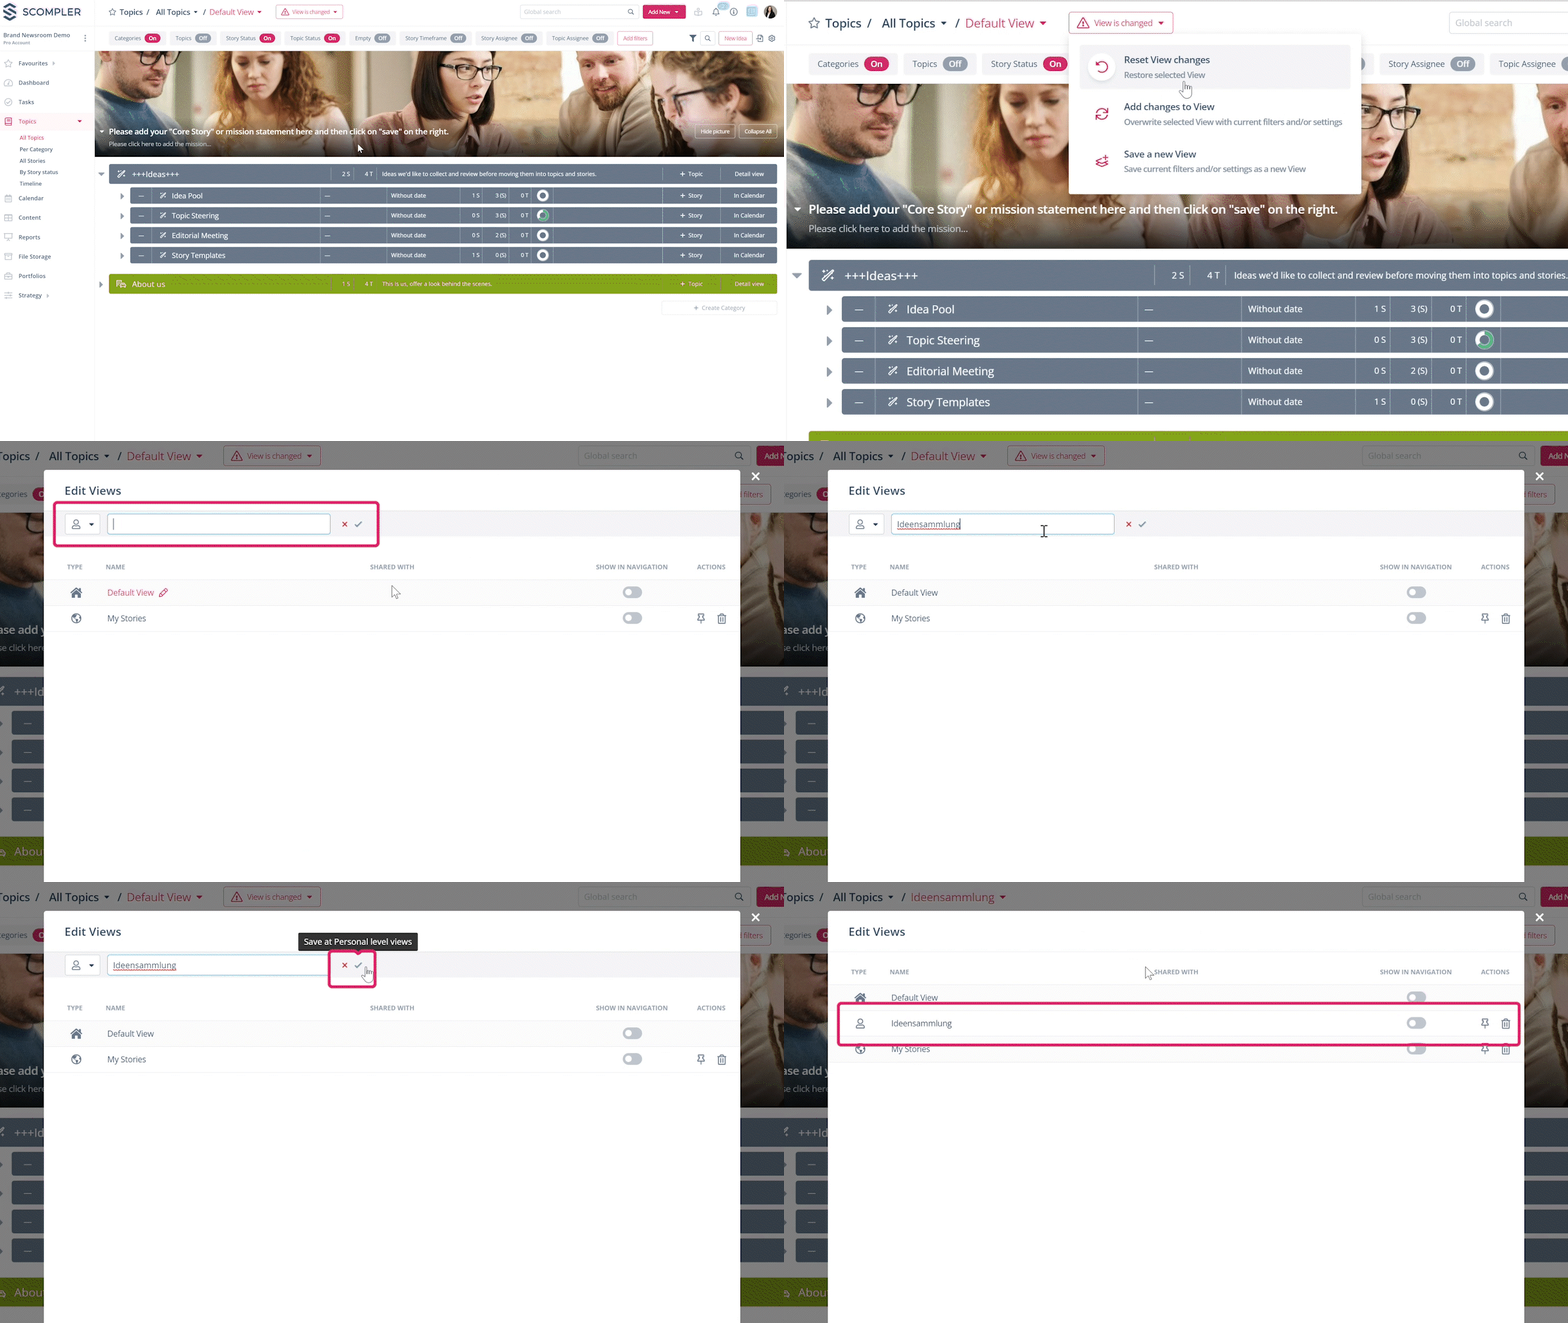
After setting up your view with the filters, click on "View is being changed" and select the option "Save a new view". A window then opens in which you must enter the name of the view in order to save it. You can save a view as a personal view, or, in projects with several users, as a global view for all team members.
Share your views
You can also grant access to your saved view to specifically selected users in Scompler. On the left of the view name you will see a "user icon", click on it and select one of the following options: "user view" to save the view only for yourself, "global view" to create a view for the whole team and "shared view" to share the view with specific members of the team. You can also add the views to your favourites list.
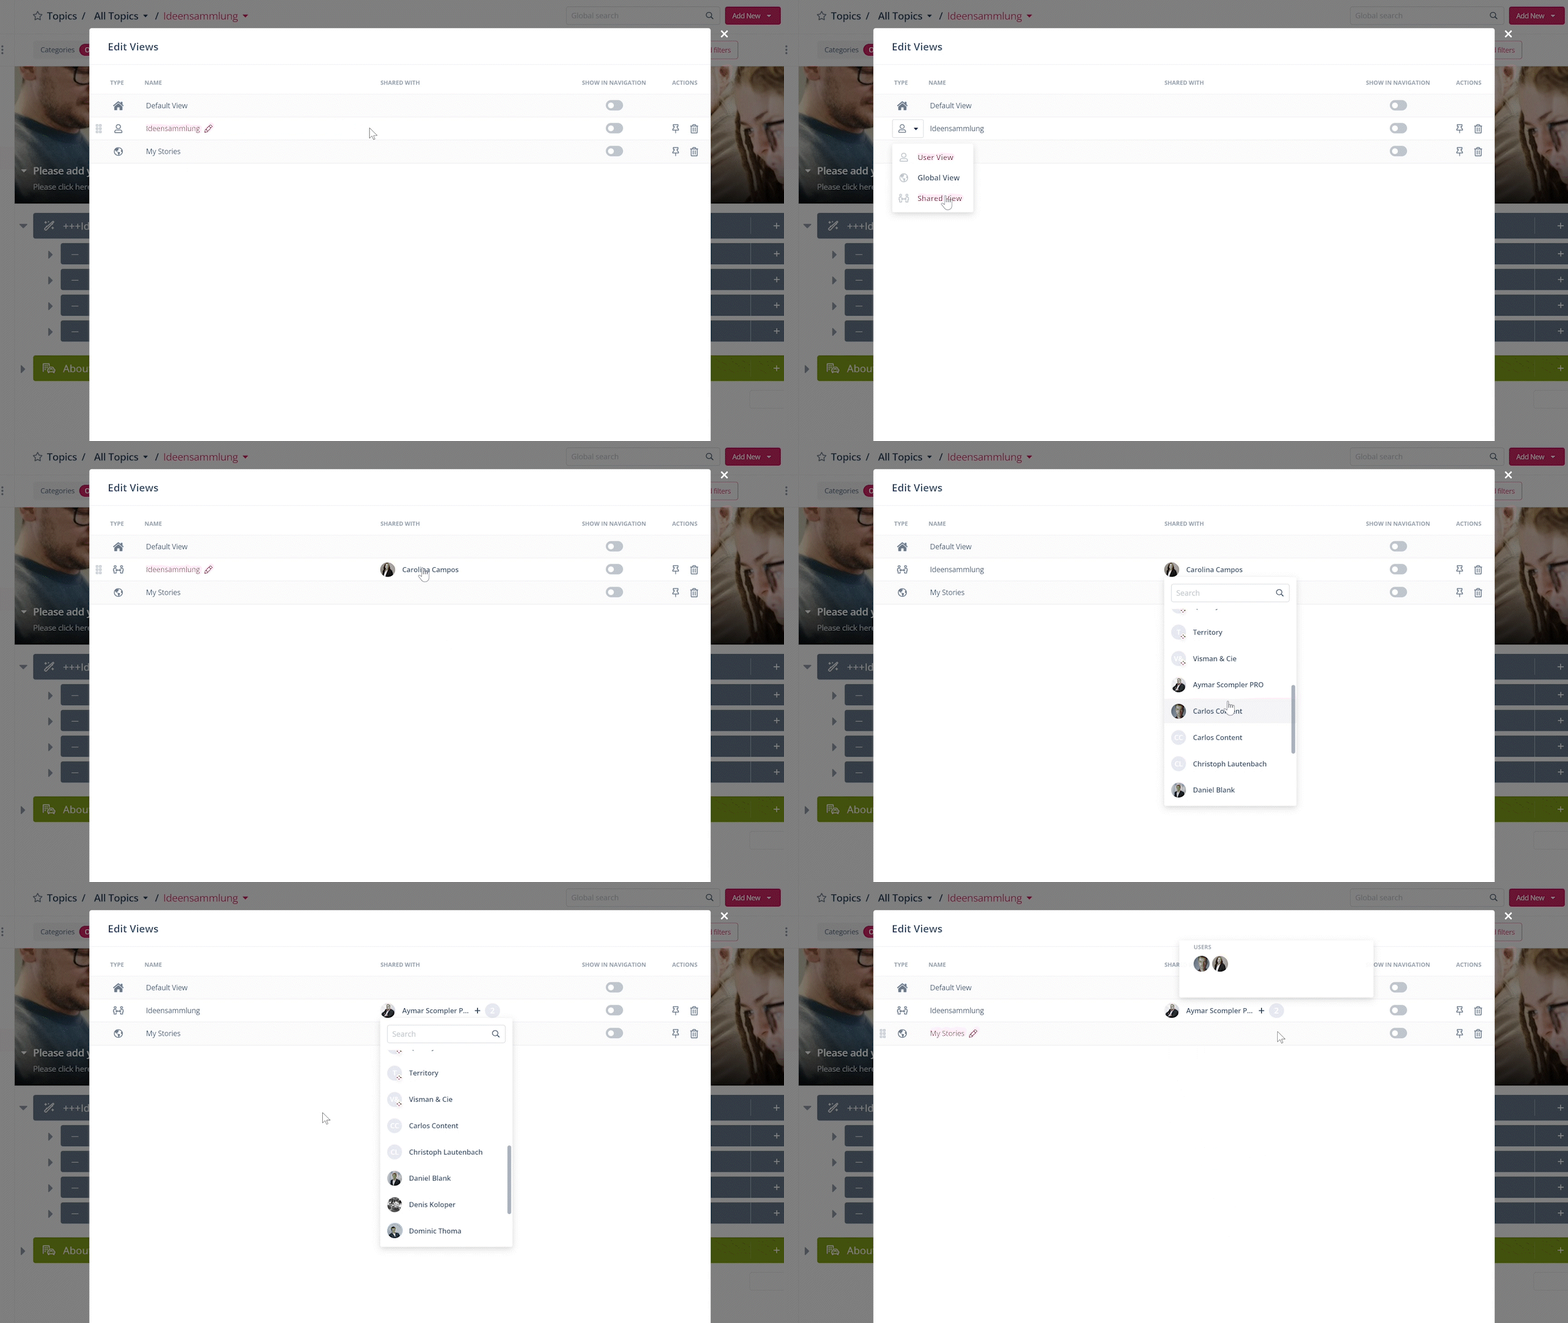
As soon as you have created and saved the desired view, you will see it in the overview. Here you can decide whether the view should be displayed in the navigation or not, by clicking on the toggle in the column "Show in navigation". You can also edit the name, delete views you no longer need or pin a frequently used one to the top of the list so that you no longer have to scroll for a long time if you have saved many views.
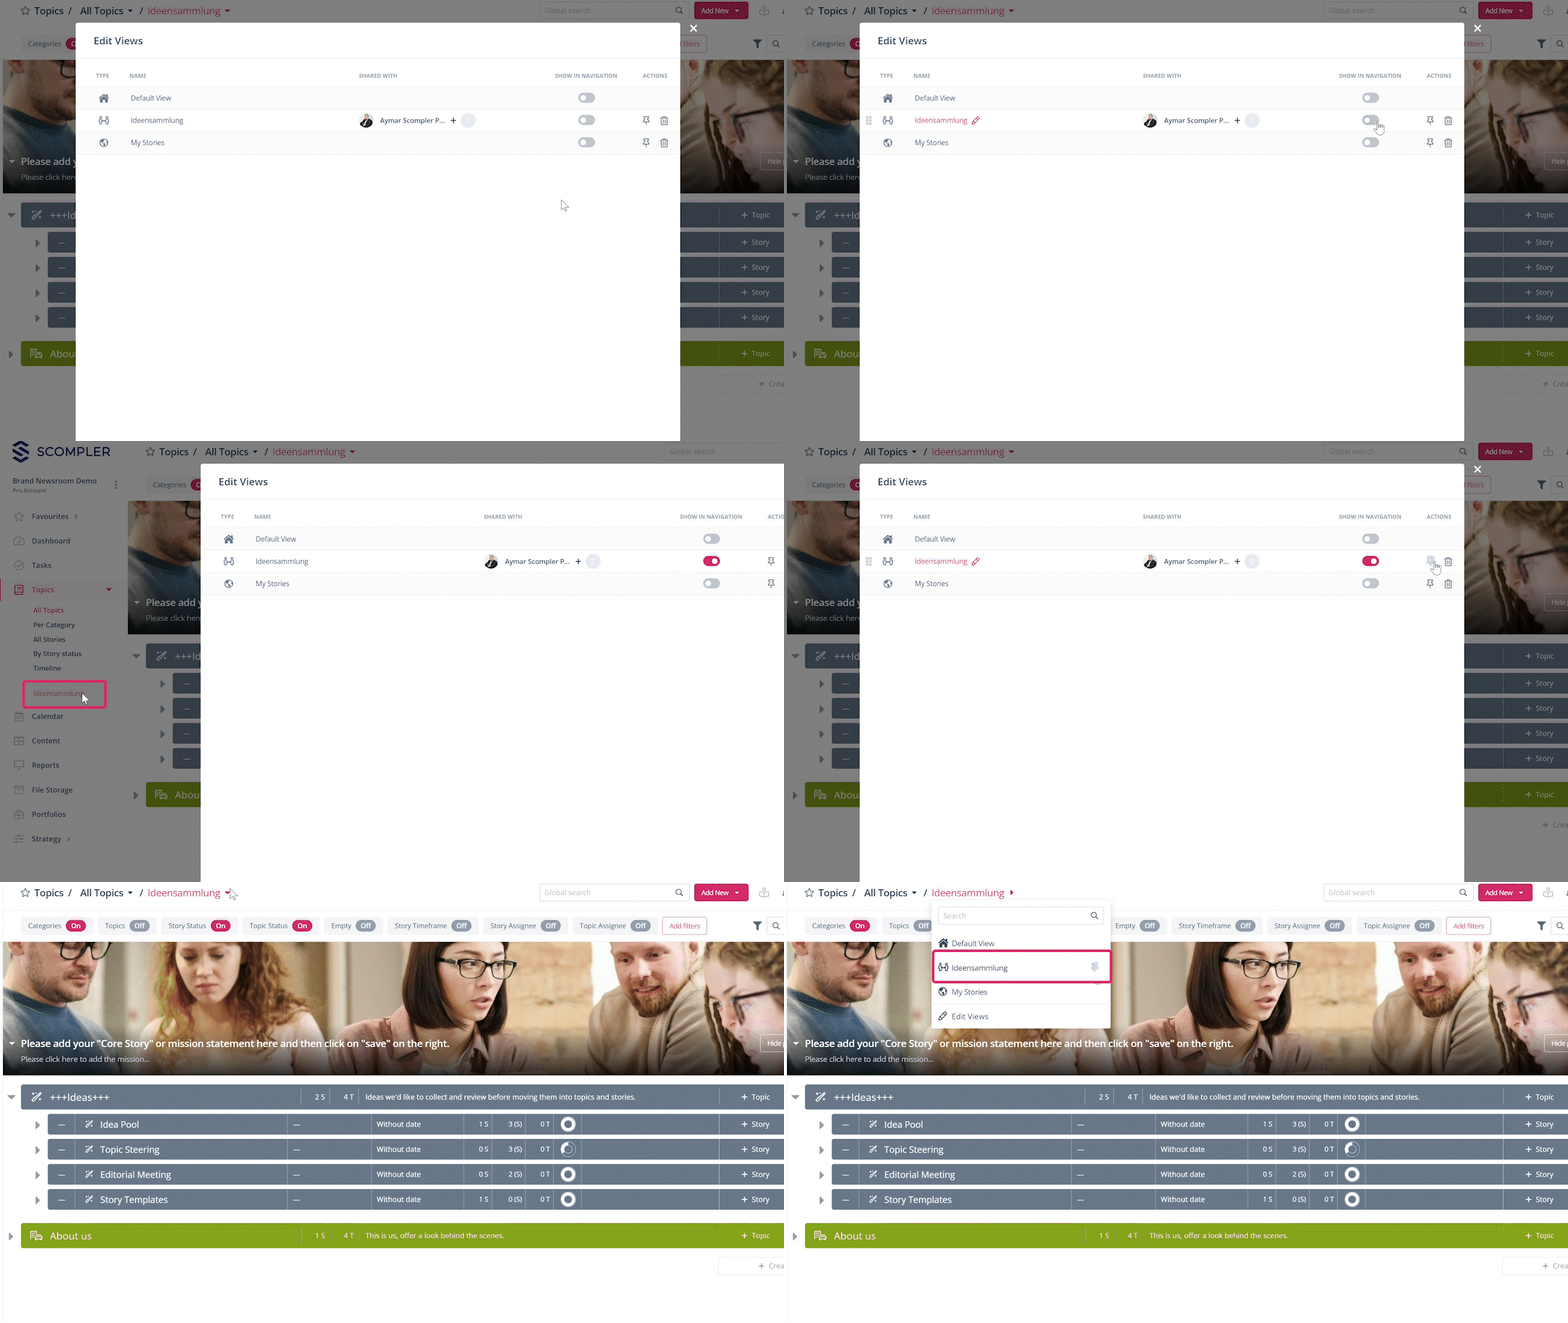
When you select the view again later, the saved filter criteria are applied to give you a quick overview of the activities that meet your requirements.
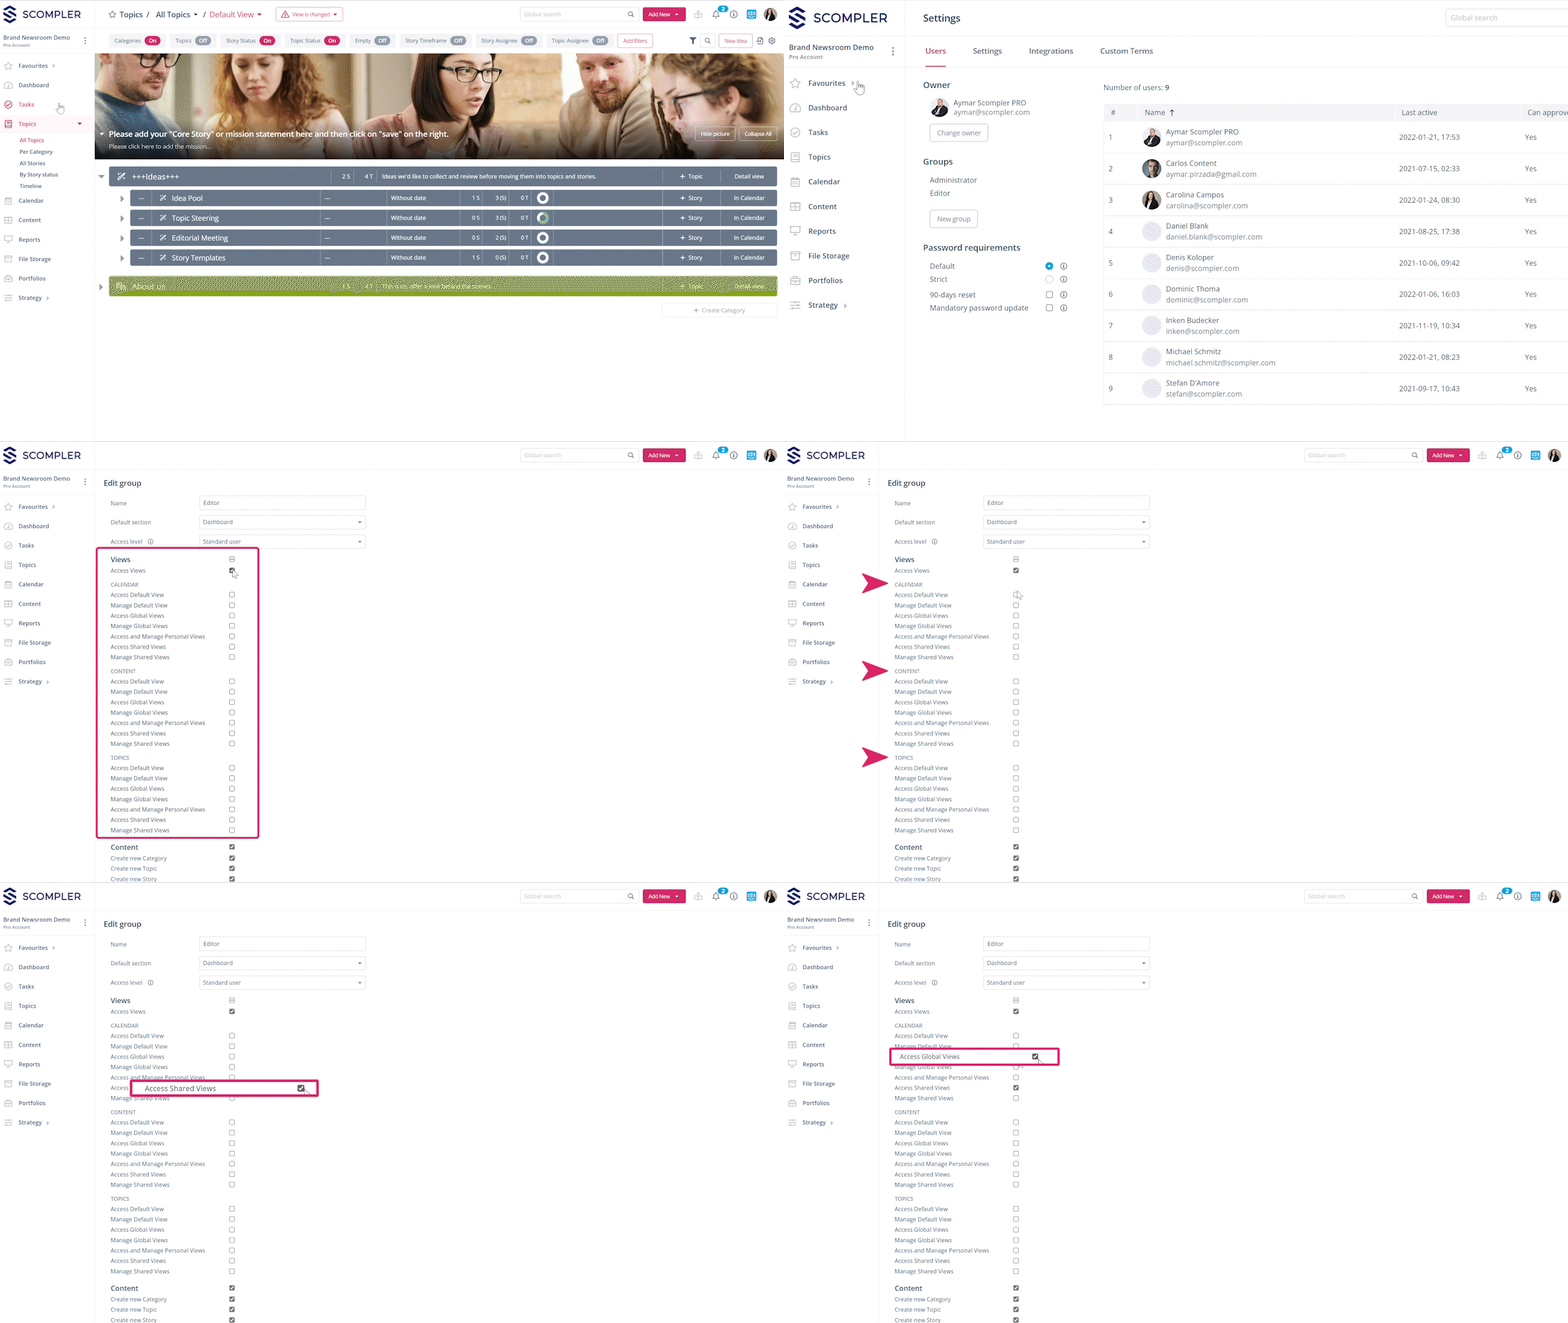
Note_ Admin! To ensure that team members can see the views created, project administrators should check whether the boxes "Access to shared views" and "Access to global views" are activated in the respective user groups (if necessary). To do this, go to the project settings and select the group in which you want to edit the rights. The option must be activated in all three desired categories of "Views": Calendar, Content and Topic view. If you also want other people or groups to manage the views, also check the box "Manage shared views" in the desired category.
