How do I create dark posts in Scompler and manage them in the Facebook Business Manager?
Create Dark Posts in Scompler, send them to your Business Manager to promote them on Facebook to interact with your audience and potential customers.

In Scompler you can easily create and schedule posts to be directly published on your social networks. It is also possible to schedule the post and send it to your Business Manager using the Dark Post functionality. This post will appear in the Business Manager and not in the news feed of your page (read here how to create a Business Manager account and connect it to your Facebook page).
Create an article in Scompler
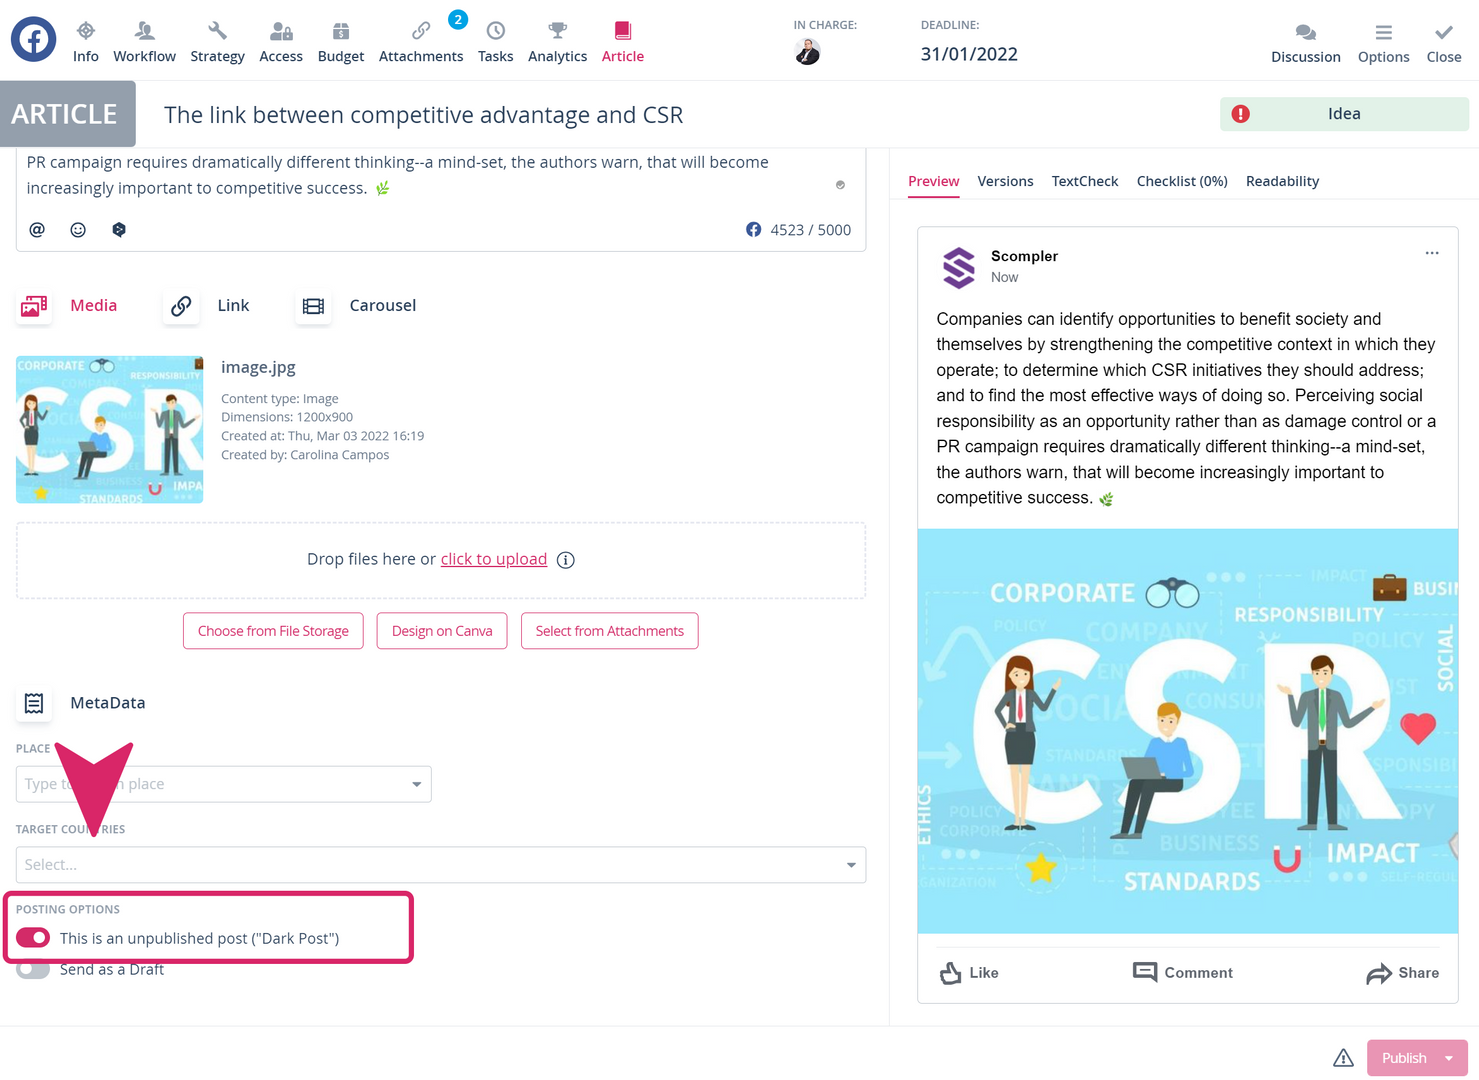
To create a dark post in Scompler, create the Facebook article as usual. Once you have created the text and added the images and a call-to-action, if required, you can mark the post as a Dark Post by ticking the box at the bottom of the article card. Then follow the remaining open steps in the workflow and select "Publish now" or schedule the post for a later date.

Note: The Dark Post is a Facebook post that does not appear in the page's feed. It is only intended as a "sponsored" post and will appear in the timeline of the target group after publication via the Business Manager. It can be either a link post, a picture post, a status update or an offer.

Manage articles in the Business Manager
Once you have submitted the post to Facebook, open your Business Manager and find the desired post to add it to an an existing campaign or publish it directly as an ad.
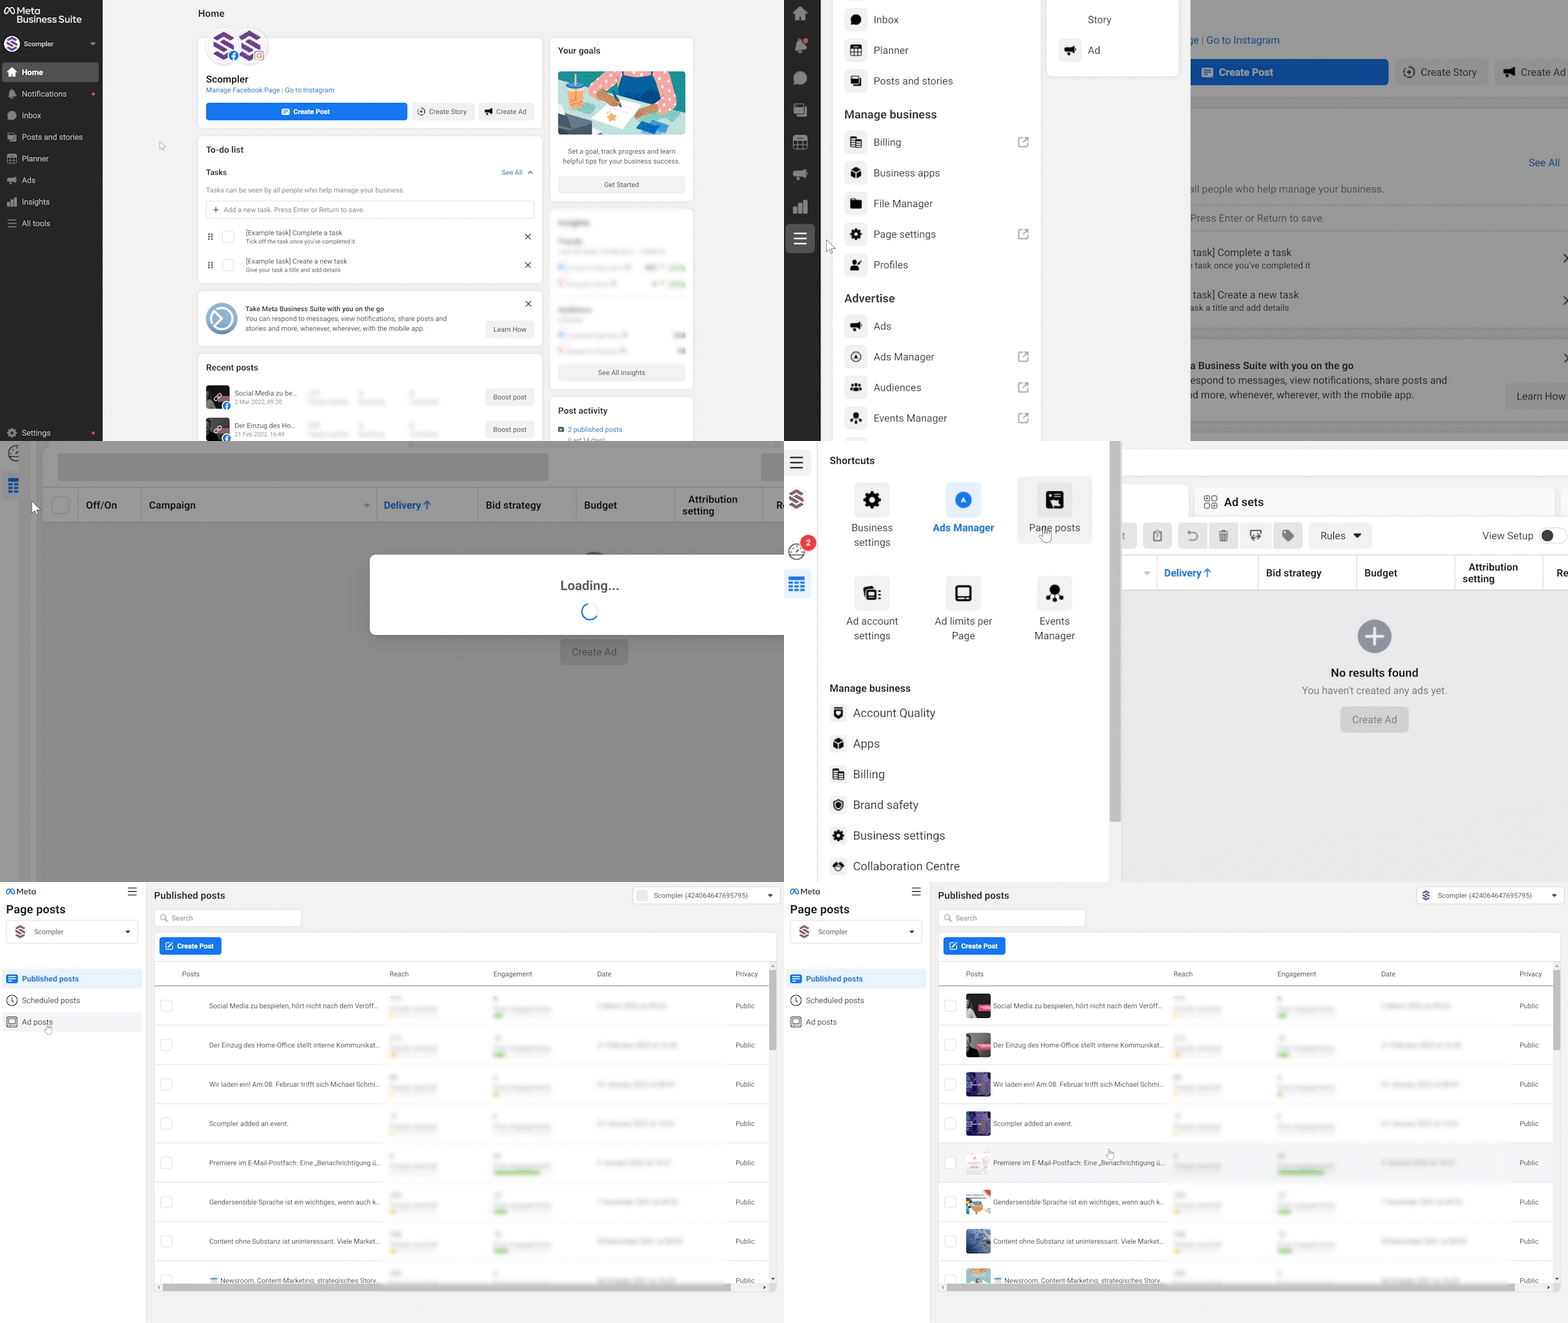
Note: When you open the Facebook Business Suite, click on "All Tools" in the left menu bar and select the option "Ads Manager" to open the Business Manager account.
In the Business Manager, click on "Page Posts" - the items in the left menu bar -. Here you have the following options:

- Published Posts: to create an ad of posts that have already been published on the page.

- Scheduled posts: to schedule a post directly in the Business Manager and create an ad.

- Ad posts: Here you will find the posts that you have created in Scompler and marked as a Dark Post. Clicking on one of these posts will open a preview image on the right. Scroll down in the options menu above the preview and select the "Create Ads" option to create the ad. You can also publish it immediately, schedule it for later or delete it.
