
The File Storage allows you easy access and clear management of all documents, images and videos uploaded in Scompler in one central location. Wherever you upload files, be it in the article, story or topic card, they are automatically added to the file storage. They can then be edited and managed, and are always available for use in other articles, stories, etc. You can also upload files directly to the file storage and assign them to the desired content from there.
The file storage offers you various functions and information:
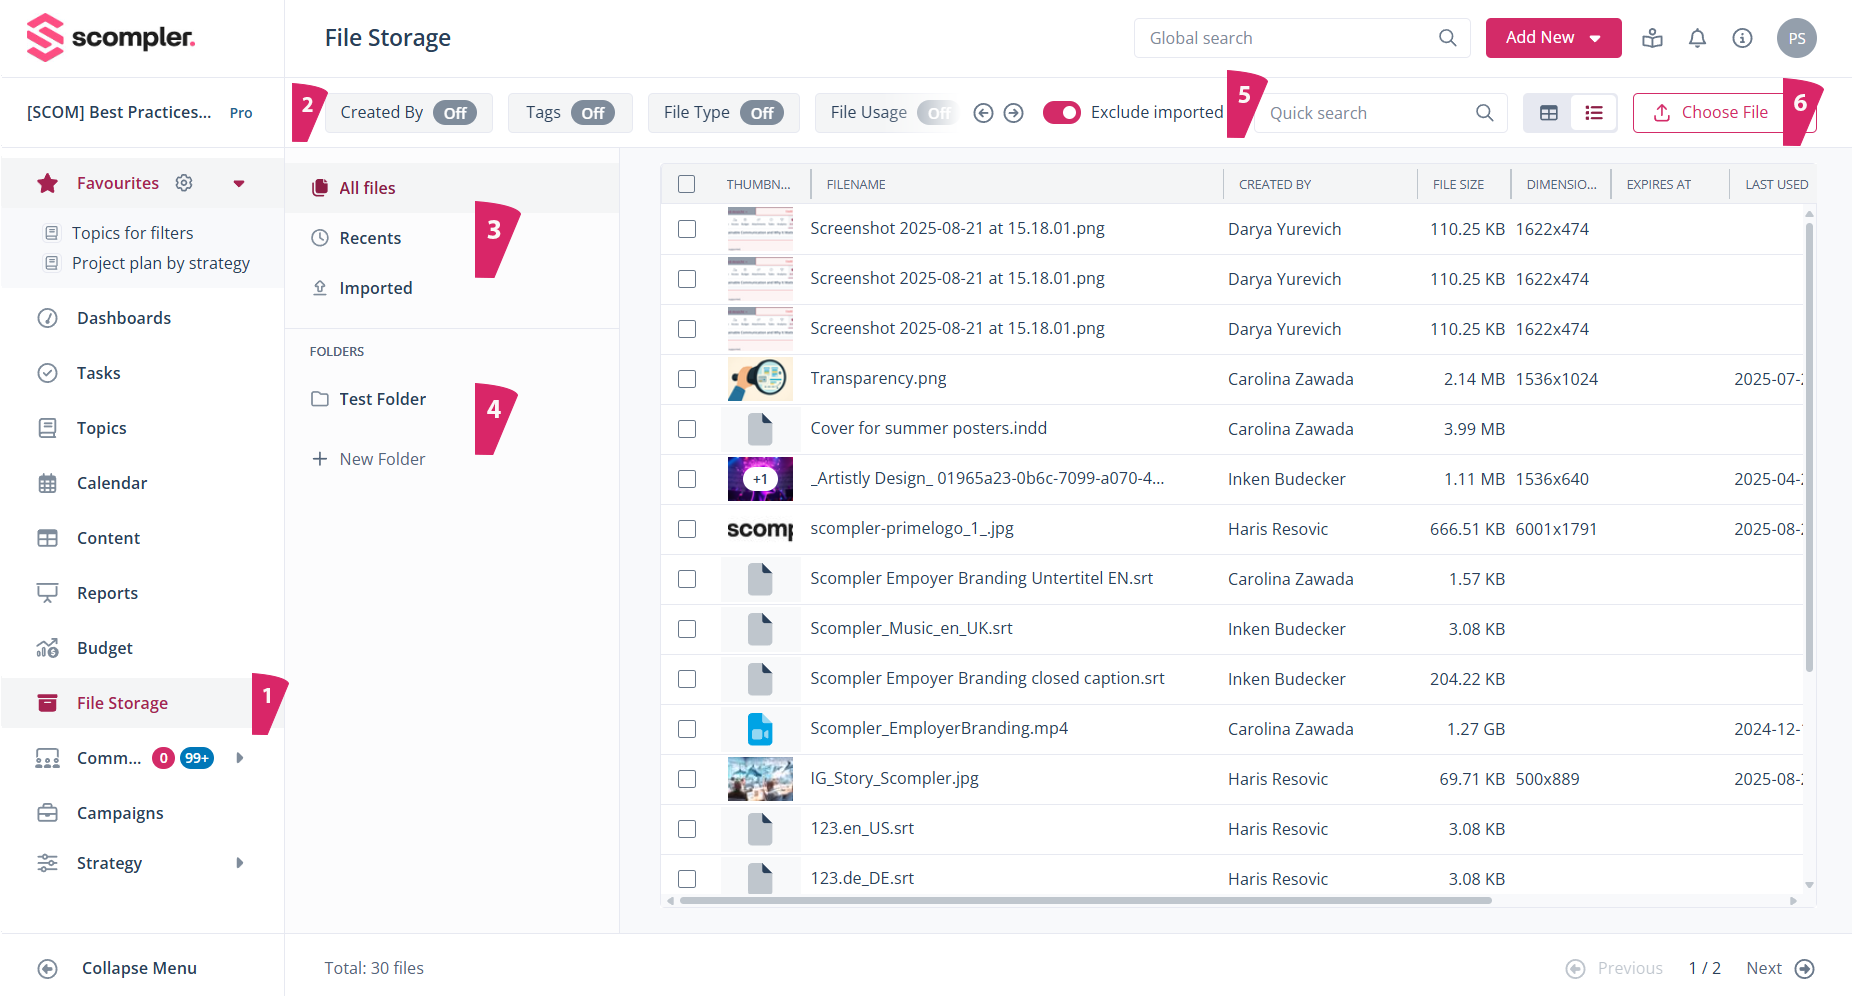
- Select “File storage” in the left navigation menu.
- Use filters such as “Created by,” “File type,” or filter by tags to get a better overview and display only the documents you want.
- Display all files, only the latest ones, or only imported ones.
- Create and manage folders and sort files into them using drag & drop.
- Exclude all imported files from the view to see only those managed in Scompler.
- Select a file to add it to the media database.

- Select a filter logic for the tags to display exactly the files you are looking for.
- Create and manage tags and tag groups that you assign to your files to sort them according to your needs. To assign a tag to a file, click on the desired file and select the desired tag in the pop-up under “Tags”.
- Assign the selected file to an article, download the file, or delete it.
- Switch between list and thumbnail view.
The file list shows you details about your files, such as file size, image dimensions, created by, etc. You can sort the list according to various aspects by clicking on the respective column header.
In the “Information” column, you can see the assigned posts, tags, and associated folders. Clicking on the corresponding icon displays the exact data.
A quick search function is also available via text input.
Heads-up: If you have previously applied a filter, reset it to the default settings by clicking "Reset", at the top left of the filters, to return to the original settings and avoid inconsistencies in the list of displayed files.
Tip: To ensure that your files can be easily found and retrieved by file creators or other project collaborators now and in the future, Scompler gives you the option to save your documents in folders and define the structure according to your needs.
This allows a file to be stored only in a specific folder, but not in multiple folders, and it can have different tags to identify them.
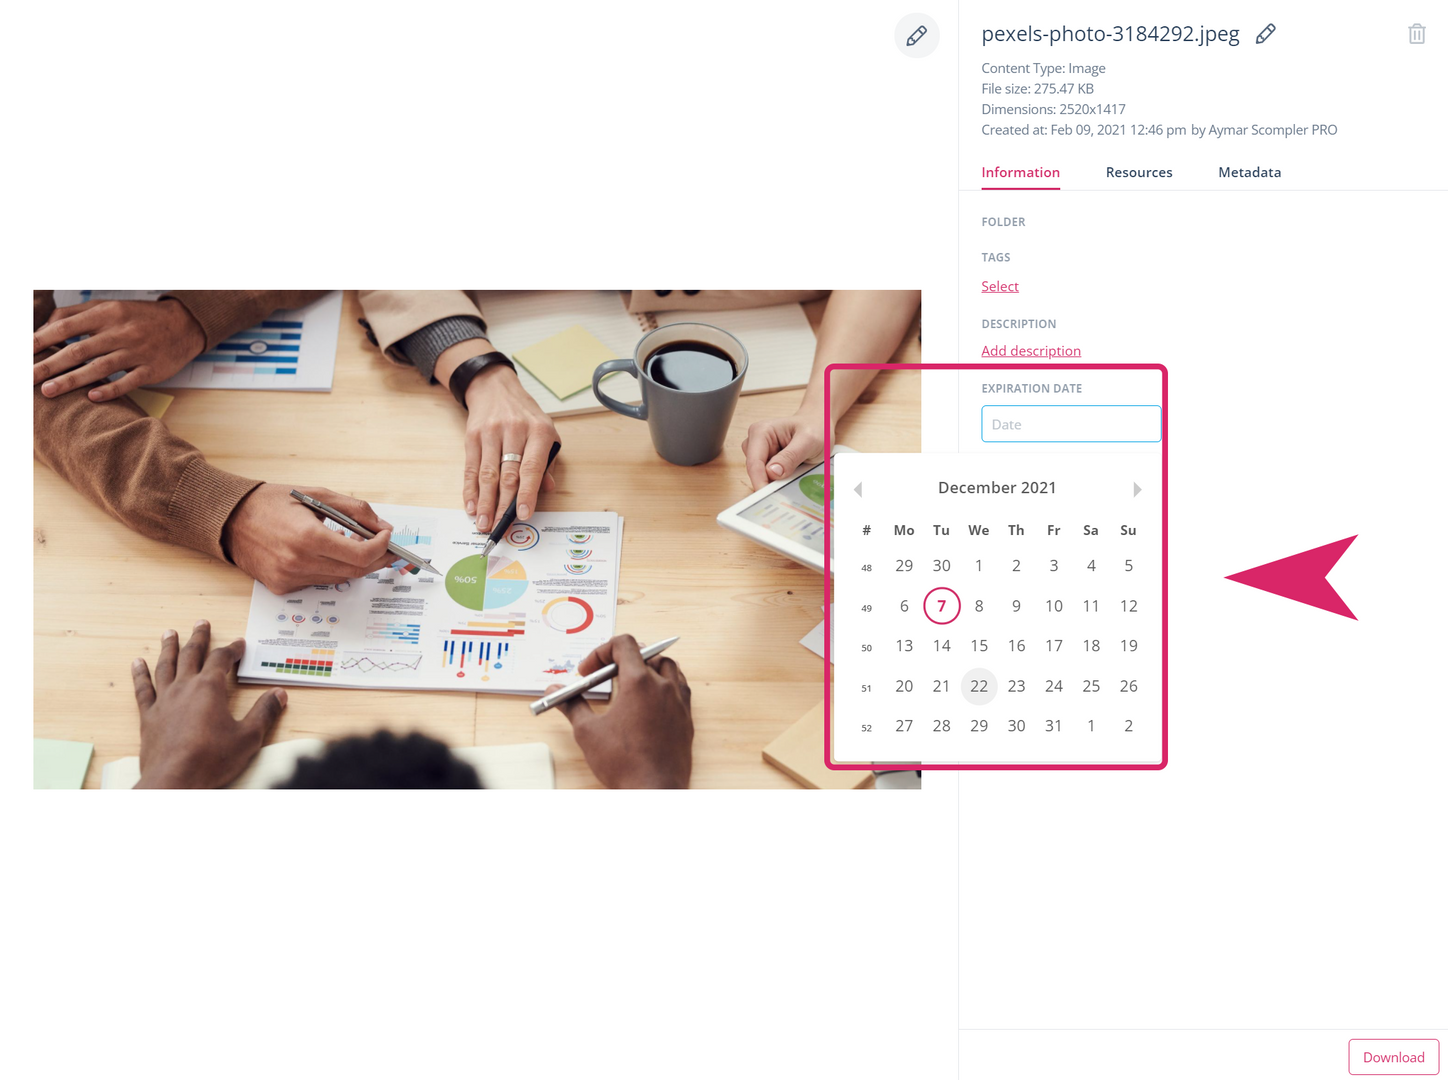
Expiry date
You can assign an expiry date to your files, e.g. to document the expiry of licence rights. To set the expiration date, open the file information card and select the desired date in the "Expiration Date" field from the calendar drop-down:
Tip: If you have entered an expiration date, your file will be marked accordingly as soon as this date has passed. However, it is still possible to use the file after the set date has expired.
In the list view, the preview image appears greyed out and a clock symbol, as well as the expiration date in red letters, indicate the missing validity:

Accessing files from the media database
You can add files from your media database directly to your topics, stories or articles by clicking the button "Choose from File Storage" under "Attachments":
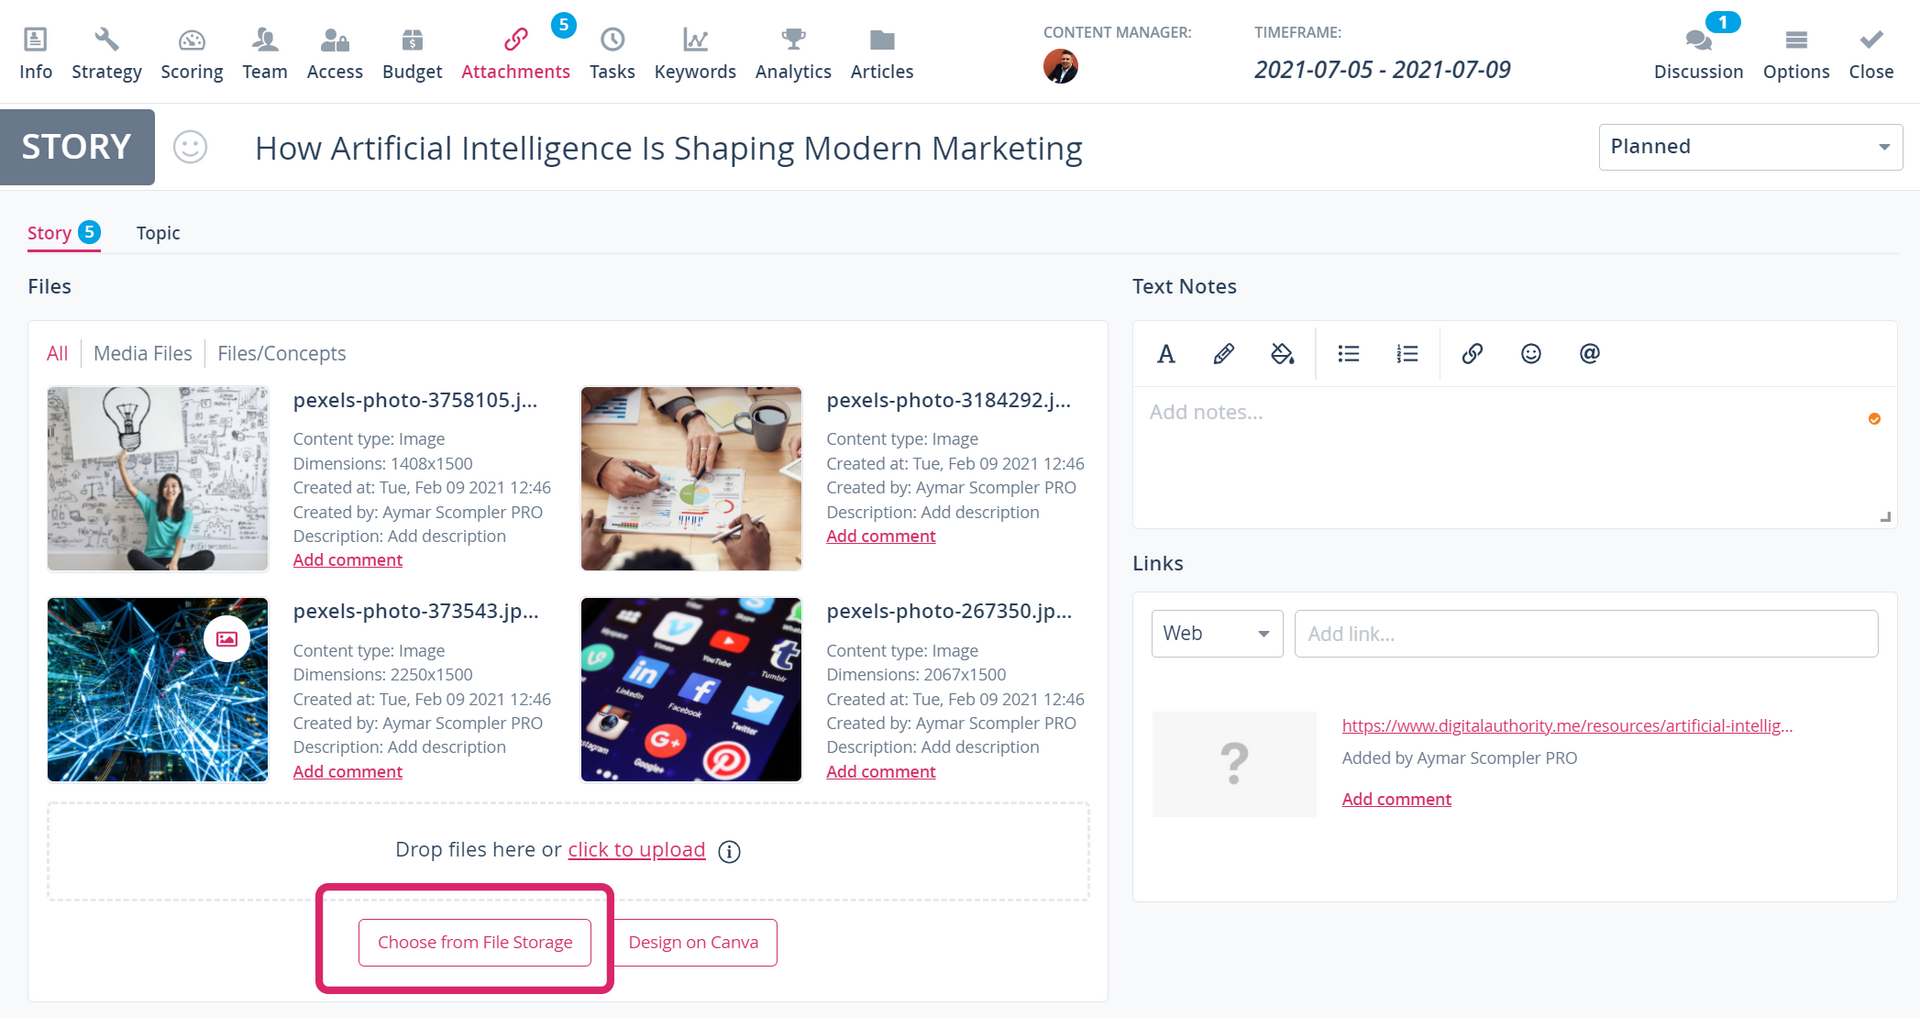
You can upload files directly to the topic, story and article card.
Supported file formats and sizes
A list of all supported file formats and sizes can be found at here.