
Define which columns should be displayed in the Content Module table.
If you’d like to display additional analysis charts above the table, refer to this article.
In this article, you’ll learn how to:
- Add columns to the table
- Remove columns from the table
- Adjust the order of columns in the table
- Save and share customized tables as views
Add Columns to the Table
- In the Content module, click the gear icon in the Content module.
The Content Settings dialog opens. - Navigate to Selected Columns > Available.
- Navigate to the category from which you want to add a column.
- Click the arrow next to the corresponding category.
The available columns are displayed. - Double-click the column you want to add.
The column is added under Selected Columns > Selected. - Click Apply.
The Content Settings dialog closes.
You have added the selected columns to the table. By default, the table displays newly added columns at the end (on the right). Depending on the number of columns in your table, you may need to scroll to the right in the table to see the newly added columns.
Remove Columns from the Table
You can remove individual columns from your table if they do not provide any value to you.
- In the Content module, click the gear icon in the Content module.
The Content Settings dialog opens. - Navigate to Selected Columns > Selected.
- Navigate to the column you want to remove.
- Double-click the column title.
The column is removed from the Selected Columns > Selected section. - Click Apply.
The Content Settings dialog closes.
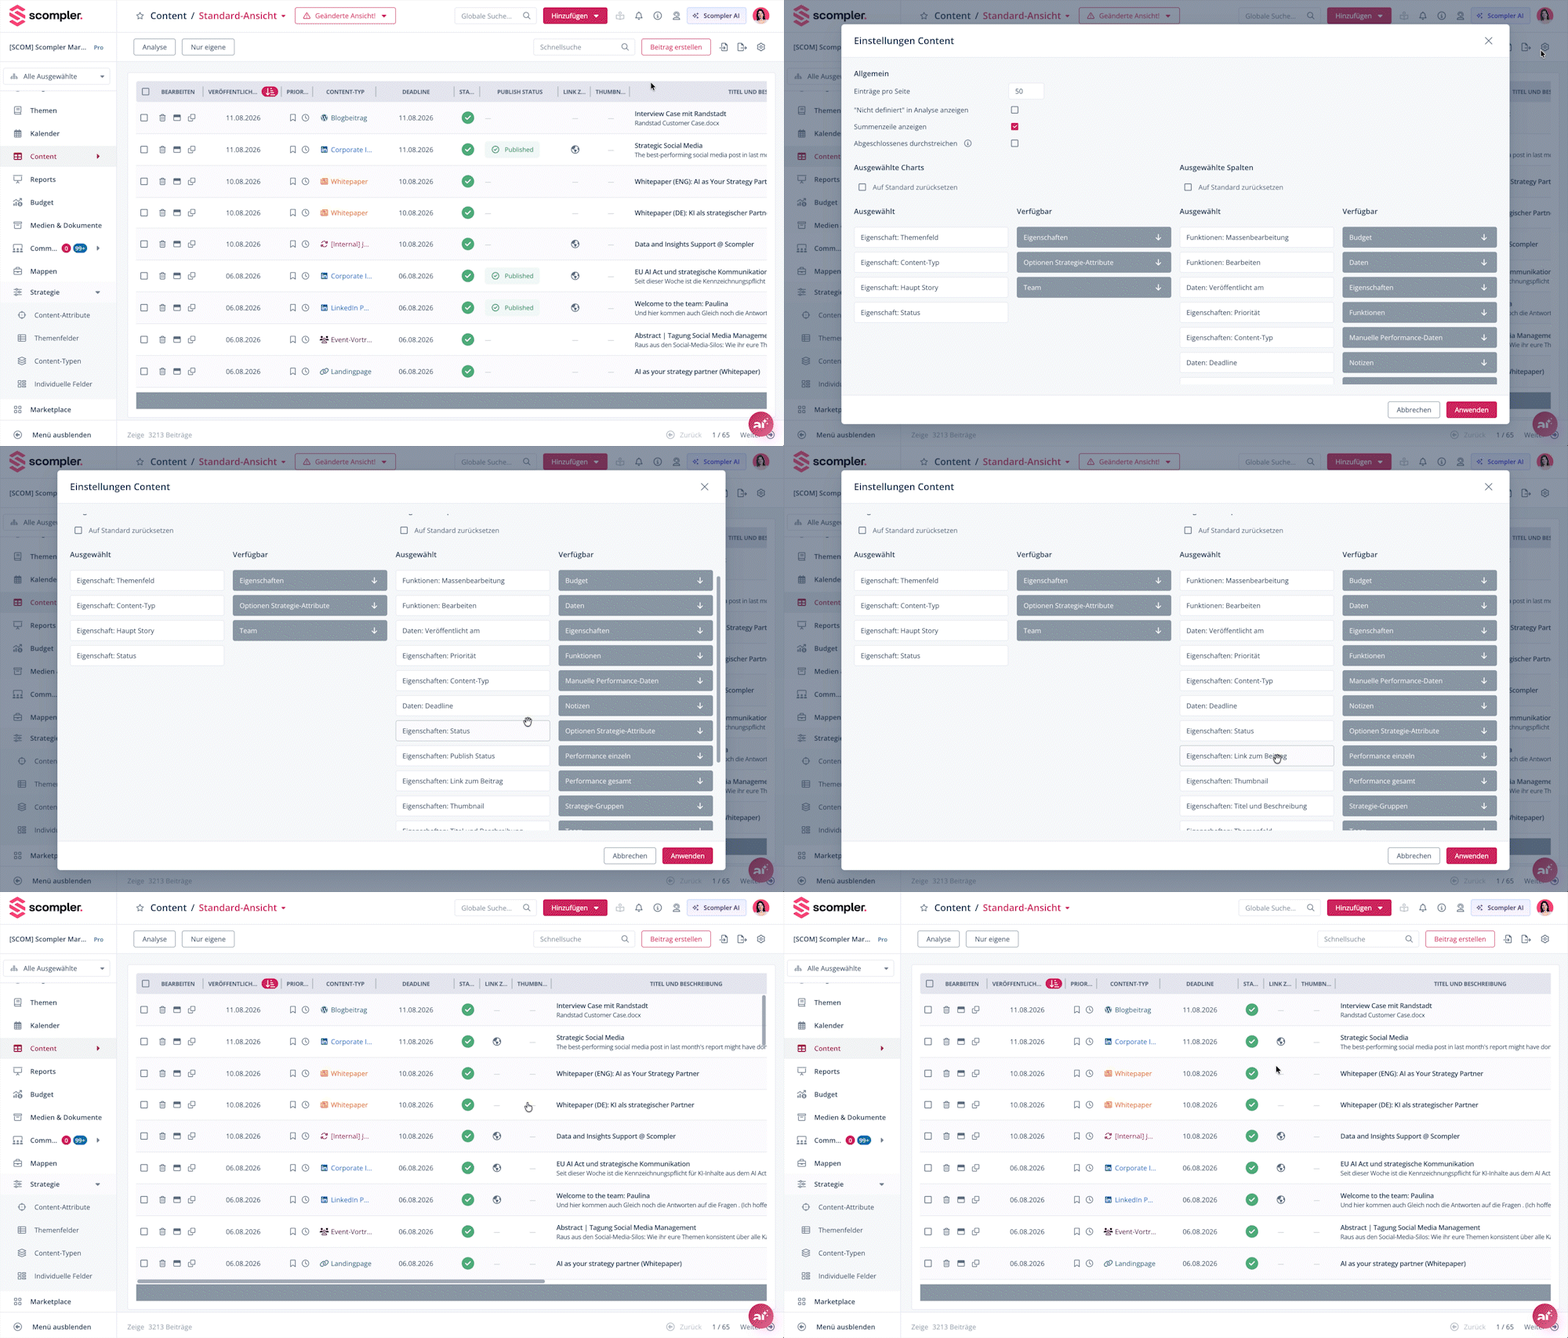
You have removed the selected columns from the table.
Adjust the Order of Table Columns
You can adjust the order of the columns in your table so that the information most important to you is visible at a glance.
- In the Content module, click the gear icon in the Content module.
The Content Settings dialog opens. - Navigate to Selected Columns > Selected.
- Navigate to the column whose position you want to adjust.
- Drag and drop the column header to the desired position.
A pink dotted border indicates where the column will be positioned. - Click Apply.
The Content Settings dialog closes.
You have adjusted the order of the table columns.
Save Table as a View
You can save the adjustments within the table as a custom view for quick access. You can use the view privately, share it with selected users, or make it available globally.
For instructions on saving custom views, see this article.