You can customise the story and topic tabs to display important information and data centrally and at a glance to improve your team's daily work.
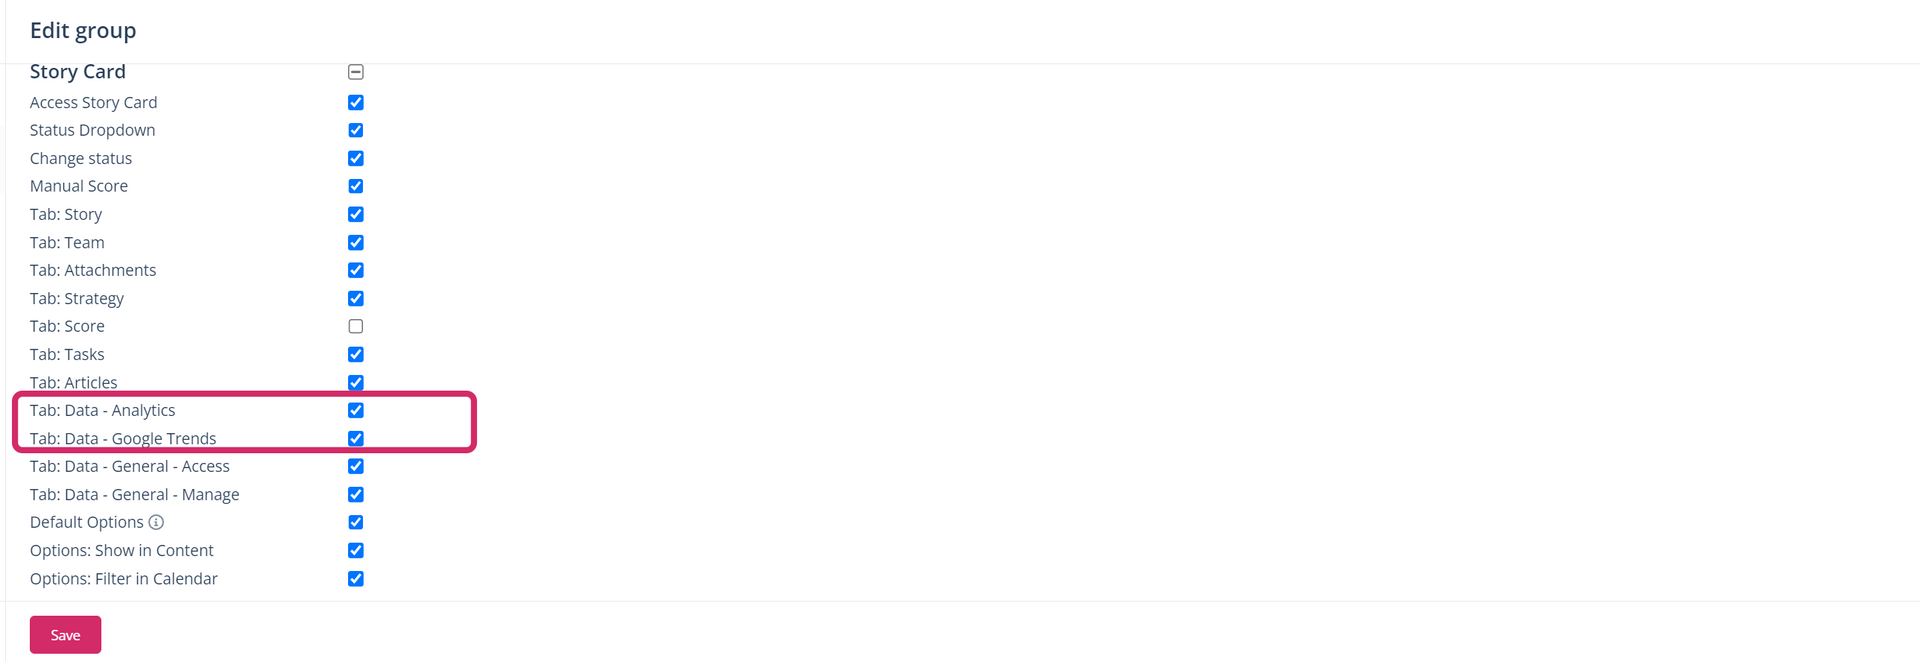
Note for administrators: To be able to manage the tabs and add widgets, project administrators should activate the permissions for the desired user groups.

Please note that changes to the cards are visible to all users with access to the "Data" tab.
Create text widgets
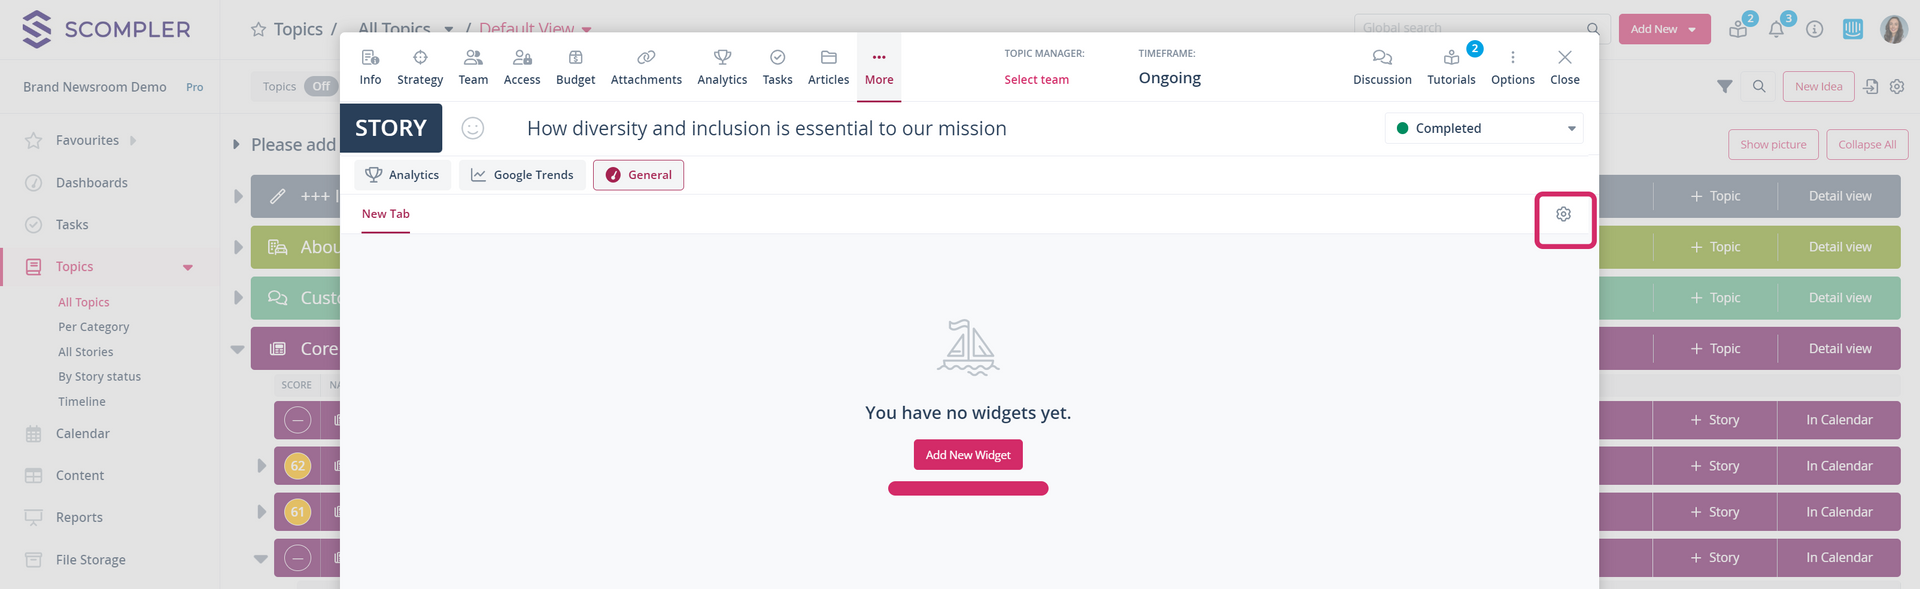
Customise the story or topic card and add the widgets of your choice. To create a widget, click on the “Data” tab, click on the configuration wheel at the top right of the card, or on the “Add new widget” button and select the “Text widget” option.
In the text widget, you can add important messages, story editing guidelines and information. To customise the widgets, a toolbar is available to format the text, add images or emojis and create hyperlinks. When you have finished creating the widget, click on the save icon in the top corner of the widget.
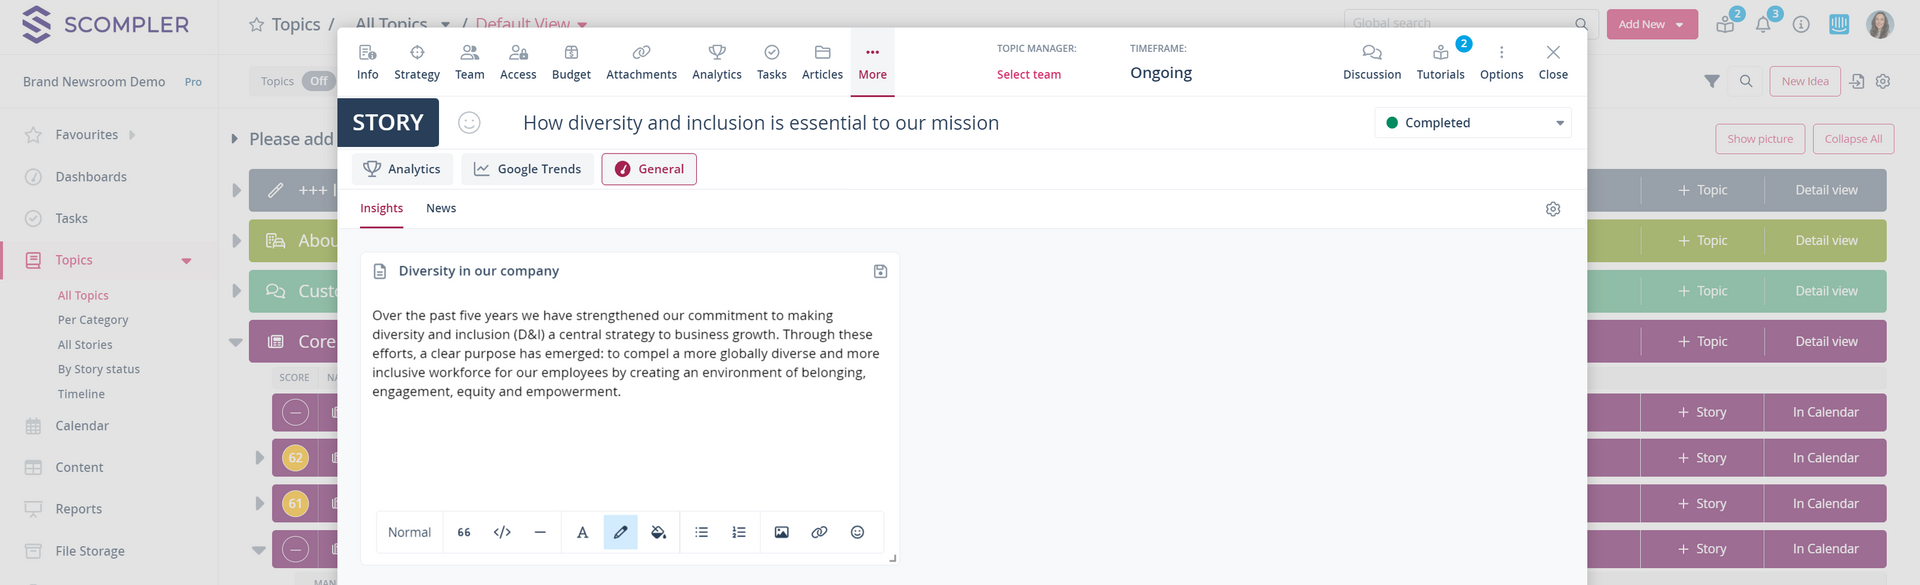
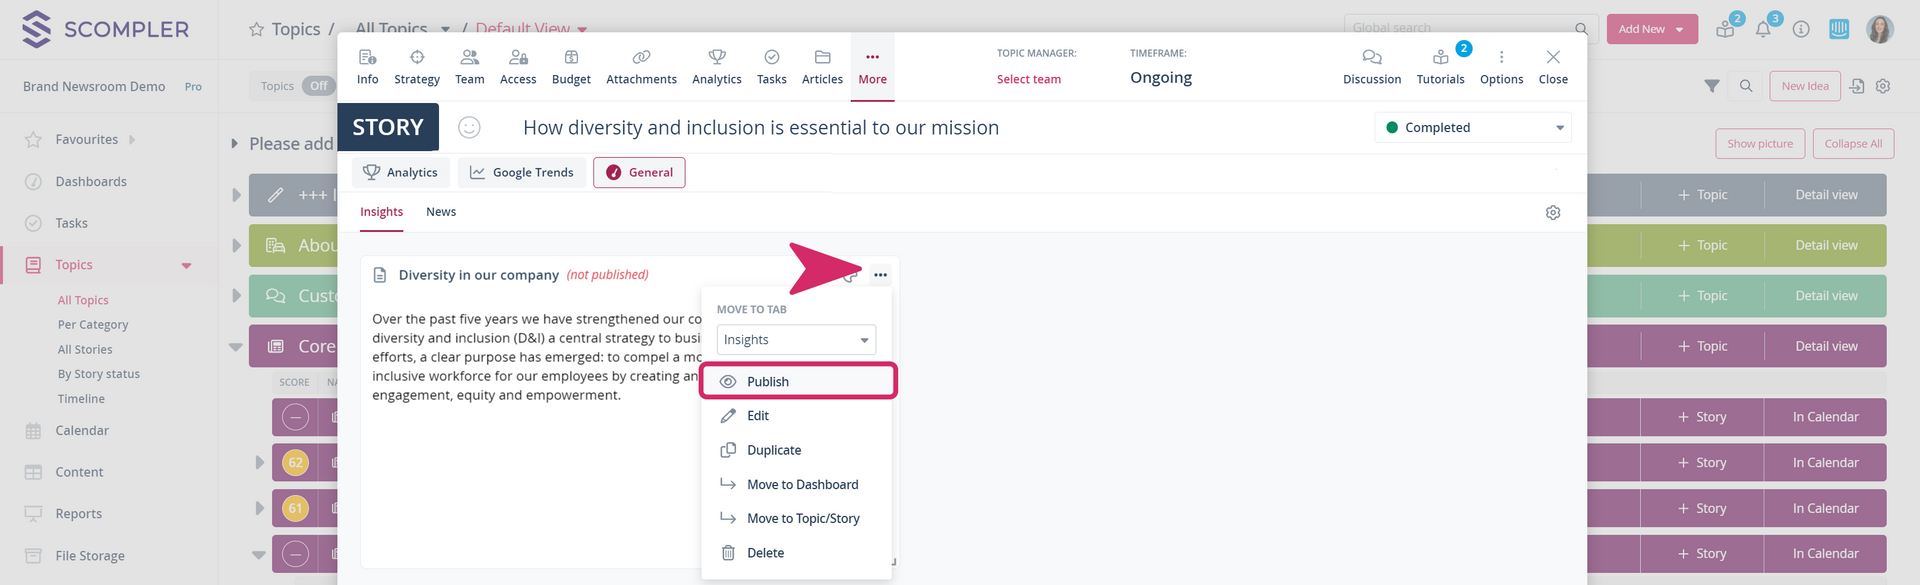
NOTE: To display the widget to all users with access to the tab, click on the three dots in the top corner of the widget and select the "Publish" option. Otherwise, the widget will only be visible to users who are authorised to manage the tab.
HTML Widgets
HTML widgets are used to embed an external page in Scompler.
NOTE: Only pages that provide the iframe can be embedded.
Click on the configuration wheel, add a new widget and select "HTML Embed". In this widget, it is also possible to format the text, add images and create hyperlinks. You can also add an iFrame by inserting the iFrame of the page you want to embed in the displayed field within the widget.

TIP: You can embed a Google Trends view, for example, by clicking "< >" and copying the script:

Manage widgets
Decide where and in which size each widget should be displayed. You can change the size if you place the cursor at the bottom right of the widget and drag it to the right/left or up/down. If you click and hold the title of the widget, you can move it to the desired position.

Under the three dots at the top right-hand you will find further options for managing the widget:
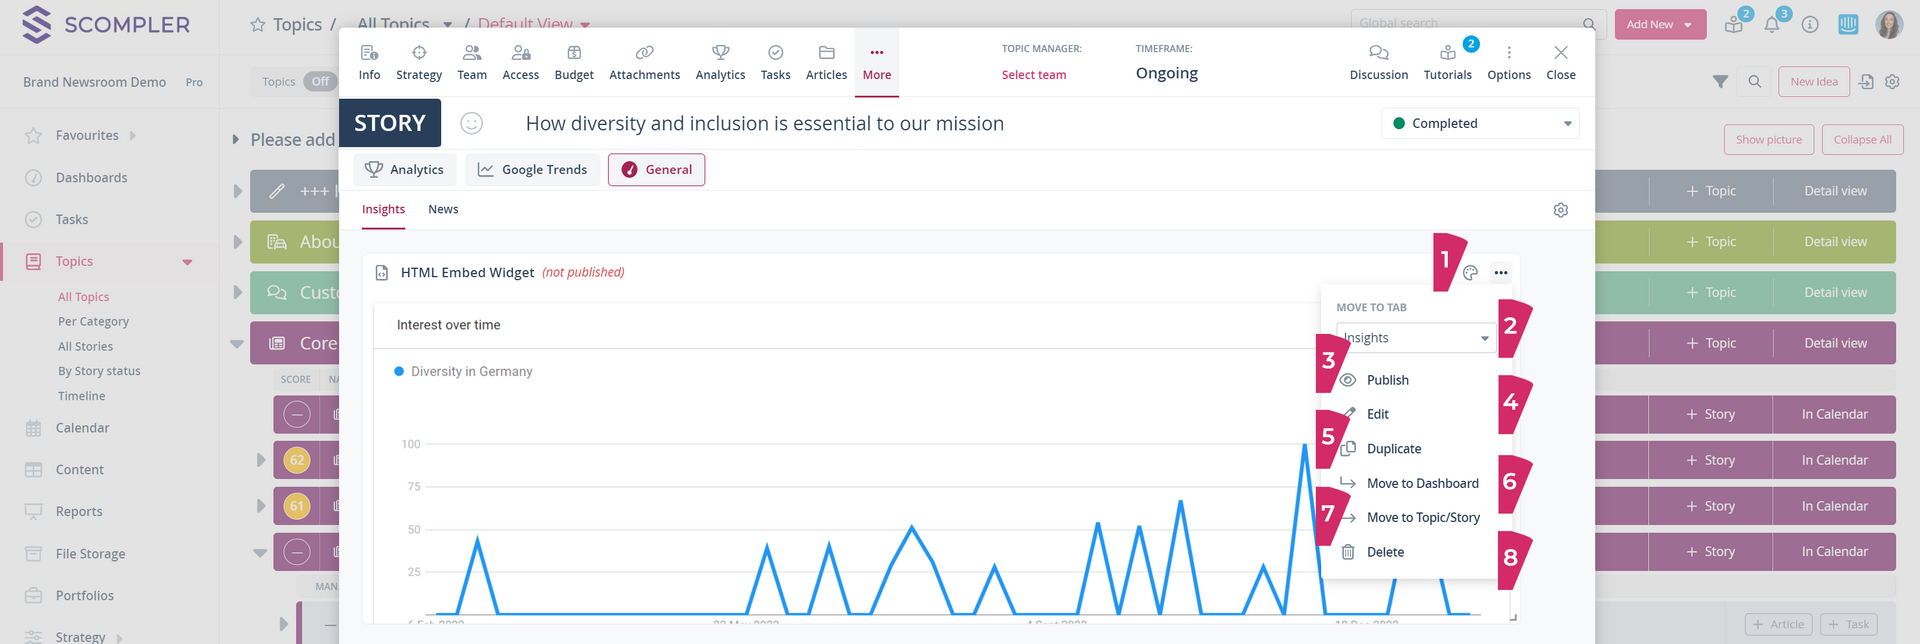
- Decide whether the widget should have a colour by clicking on the available colours.
- Move the widget to another subtab by clicking on the drop-down menu and selecting the desired subtab.
- Publish the widget so that it is visible to all users who have access to the tab.
- Edit the text of the widget if necessary.
- Duplicate the widget.
- Move to Dashboard.
- Move to a Topic or another Story card
- Delete the widget.
TIP: You can also publish, unpublish or delete a widget using the configuration wheel.
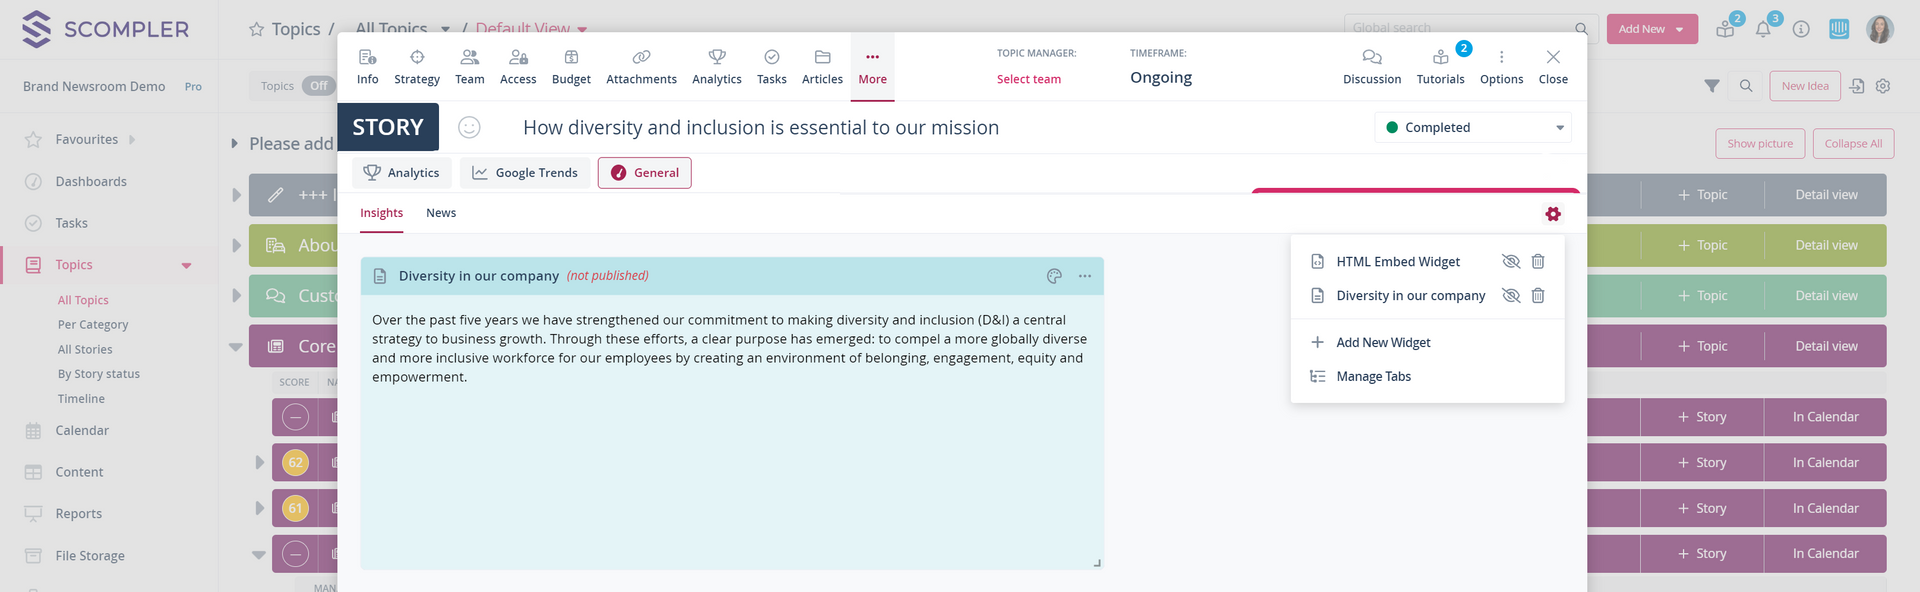
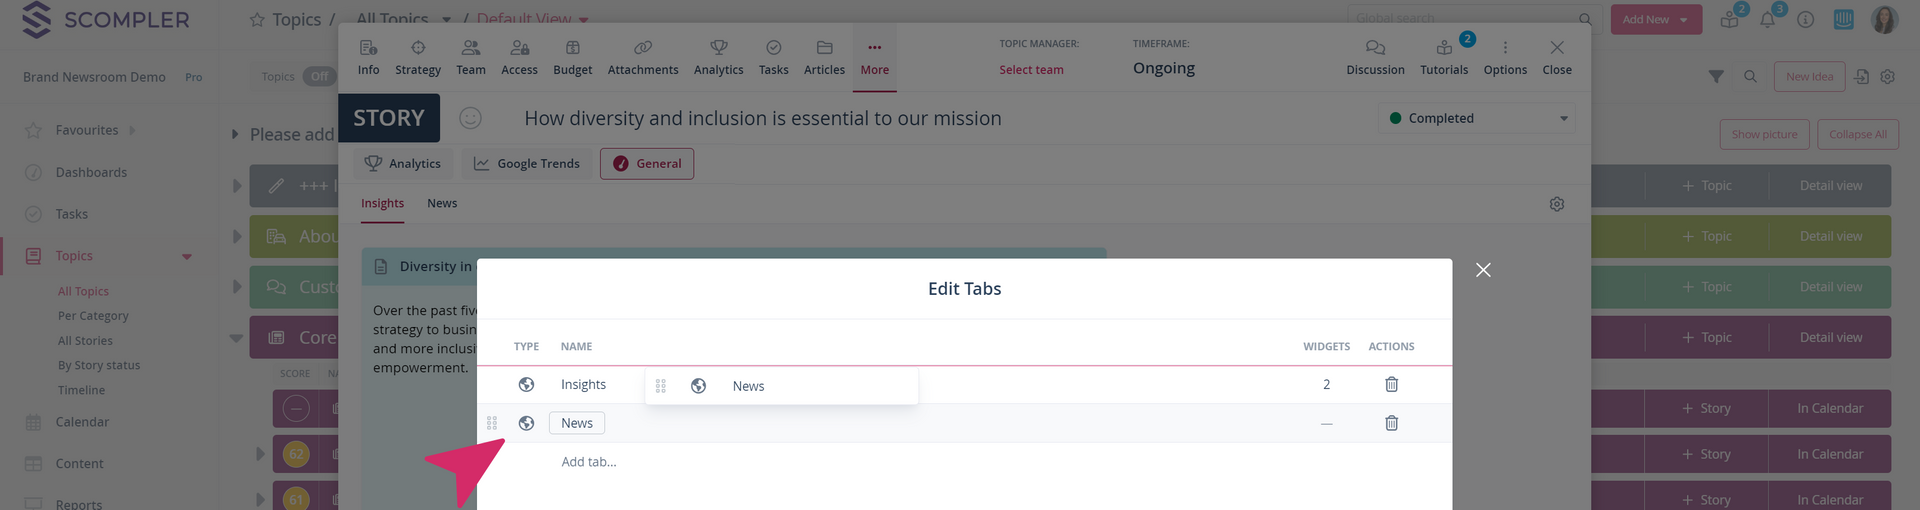
Manage Subtabs
Click on the configuration wheel and select the option "Edit tabs". In the pop-up window, you can add subtabs, edit the names of the existing subtabs and adjust the order by dragging and dropping.
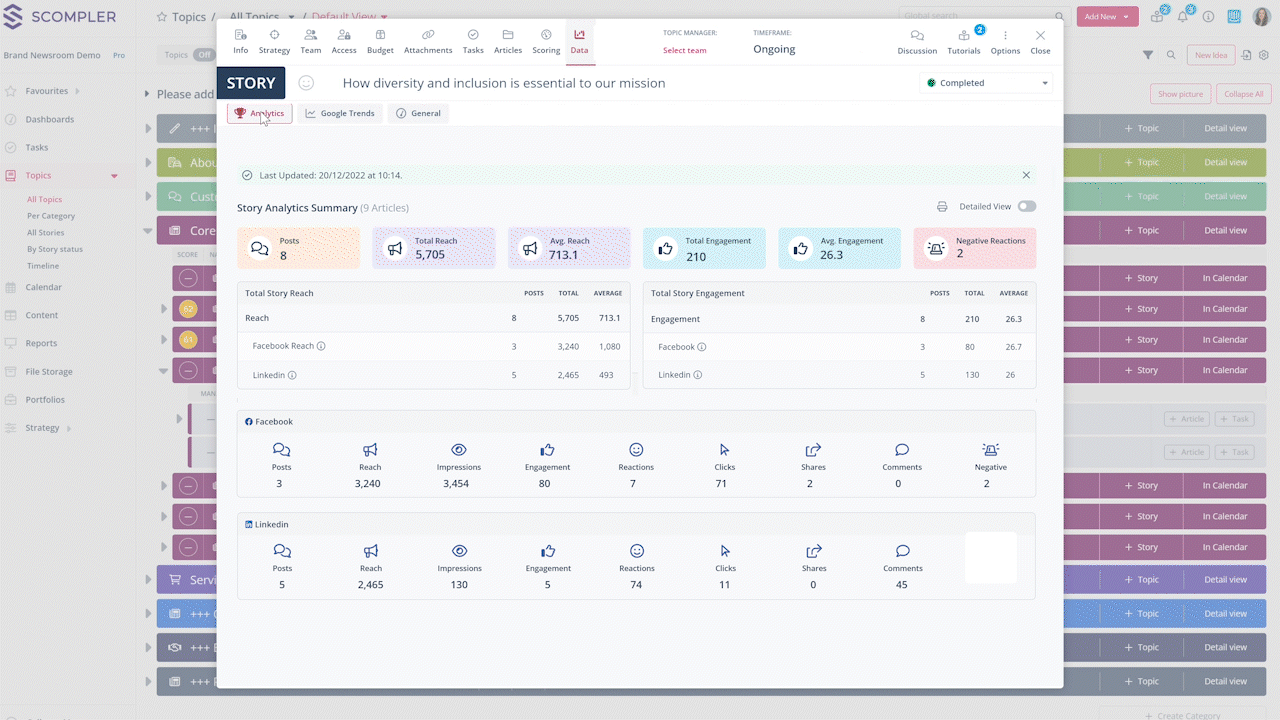
TIP: You can have the tabs "Analytics" and "Google Trends" available in the Topic and Story cards if the administrator activates the tabs for the user group. You will then find these tabs under "Data":