Working with internal and external forms to submit ideas
Submitting ideas made easy: With the idea form, internal and external users can contribute new ideas to your Scompler project!
Set up internal forms for Scompler users
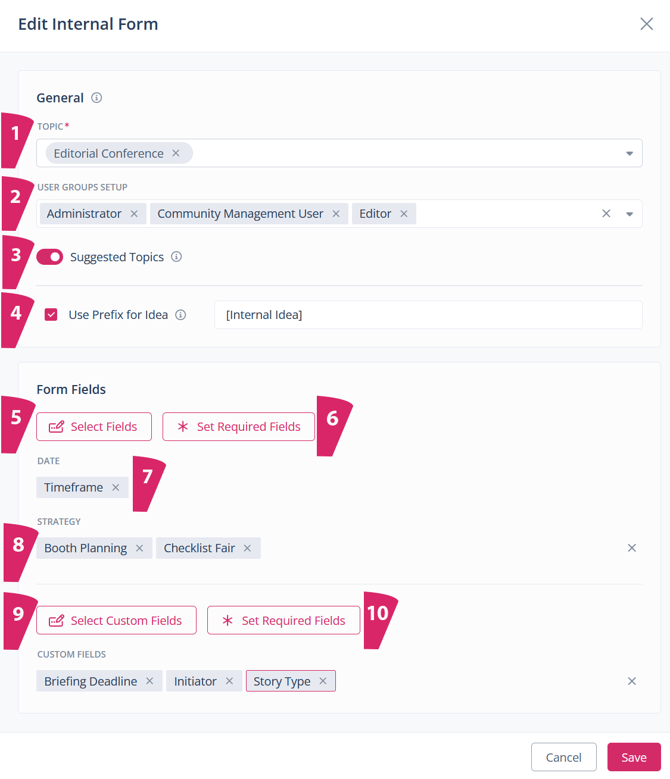
Under the Strategy area, navigate to “Idea forms” to define the layout of your internal form. The “Internal forms” tab is already open here. Click on “Edit form” to open the editing window:
In the editing window:
- (1) Set the topic to which the idea will be automatically assigned.
- (2) Add the user groups that will have access to the form. Only users in these groups will see the “Add new idea” button.
- (3) When activated, the slider will display a drop-down menu in the form creation window, allowing users to select secondary topics to link the idea to.
- (4) Activate this option to give the idea an individual prefix, which will then be added to the title of each idea.
- In the “Form fields” section, (5) select which fields the form will have and (6) specify which fields are mandatory.
- (7) The option to add a “Date” field appears only if this field has been selected beforehand.
- (8) See an overview of the selected strategy attributes. You can delete these parameters individually or all at once by clicking the X.
- (9) Add custom fields to the form and decide which of these fields must be filled in (10). You can find out how to create custom fields here.
- Click on “Save” to save the changes to the form.
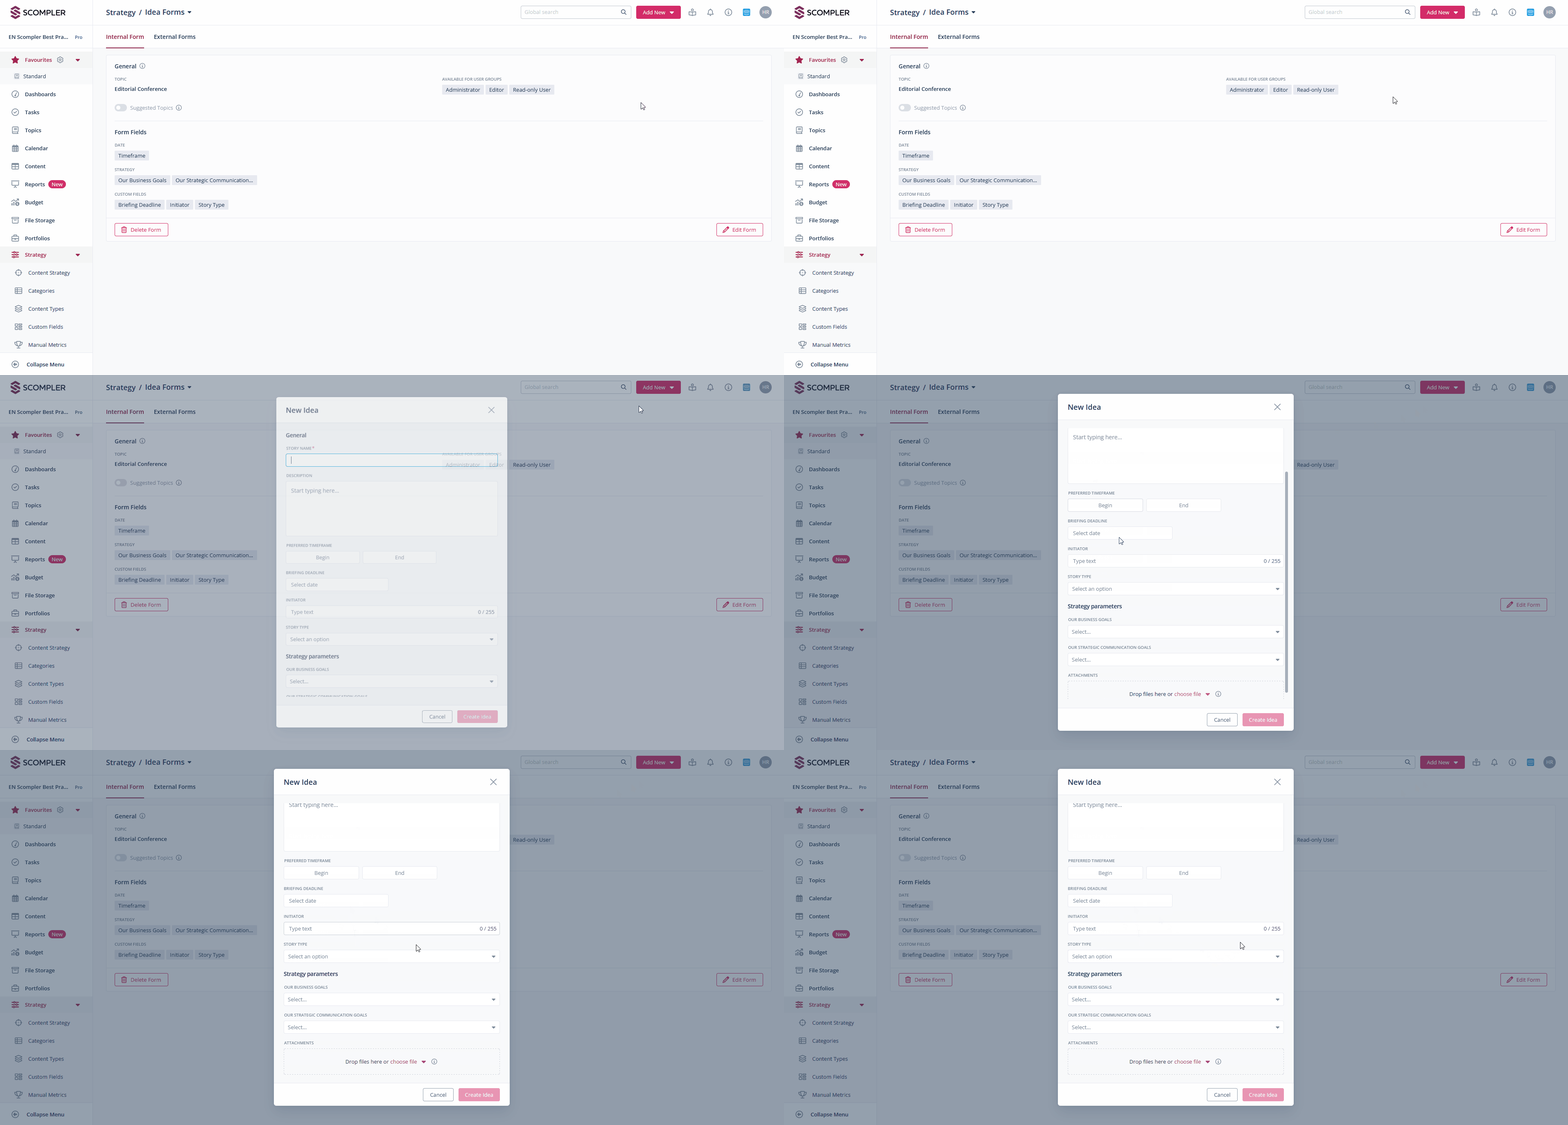
Now, project users can click on “New idea” under the “Add” button to open and complete the internal form for a new idea. They can also add files under “Attachments”.
Set up external forms for users without Scompler access
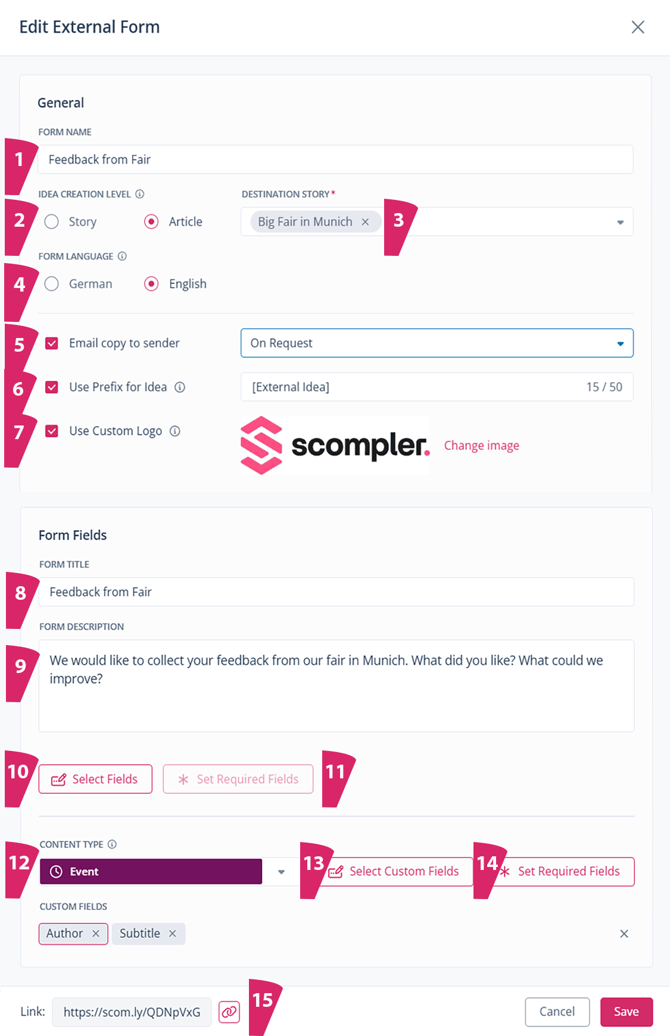
To create an external form, navigate to the “External forms” tab and click on the “Create new form” button at the top right. The following window will open:
In the editing window:
- (1) Give the form an internal name.
- (2) Decide whether the idea will be created as a story or article in your Scompler project.
- (3) Assign the idea to a specific topic or story. For confidentiality reasons, the name of the topic or story will not be displayed in the form.
- (4) Choose the language for the form (this does not affect the language of the form contents).
- (5) Choose if an e-mail copy should be sent to the person submitting the form.
- (6) Activate this option to give the idea an individual prefix, which will then be added to the title of each idea.
- (7) Here you can decide whether your company logo will be displayed in the external form, or whether you would like to use a different logo.
- In the “Form fields” section, (8) enter the title and (9) description of the form. This information will be a guide for the external user in submitting their idea.
- (10) Select which fields the form should contain and (11) specify which fields are mandatory, as with internal forms.
Additional options:
- If “Article” is selected as the level, an additional drop-down menu (12) will appear to determine the content type of the article.
- (13) You will find selectable custom fields which can be enabled for these content types and marked as mandatory (14). Learn how to create custom fields here.
NOTE: Only the custom fields that are also linked to the topic/story selected above are available. Please also note that the standard content type “Idea” does not have any custom fields. Another content type must first be selected before the custom fields can be selected.
- (15) You will find the link to the form, which you can share with external colleagues or customers.
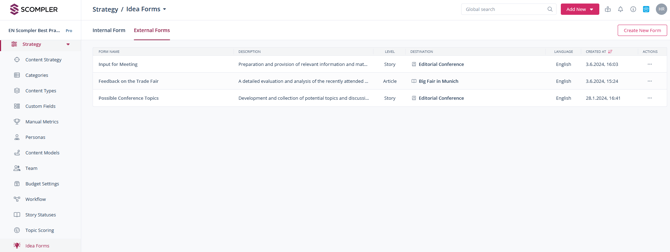
You can find an overview of all created external forms in the “External Forms” tab:
In the “Actions” column, you can copy the link to the form, and duplicate, edit or delete the form.
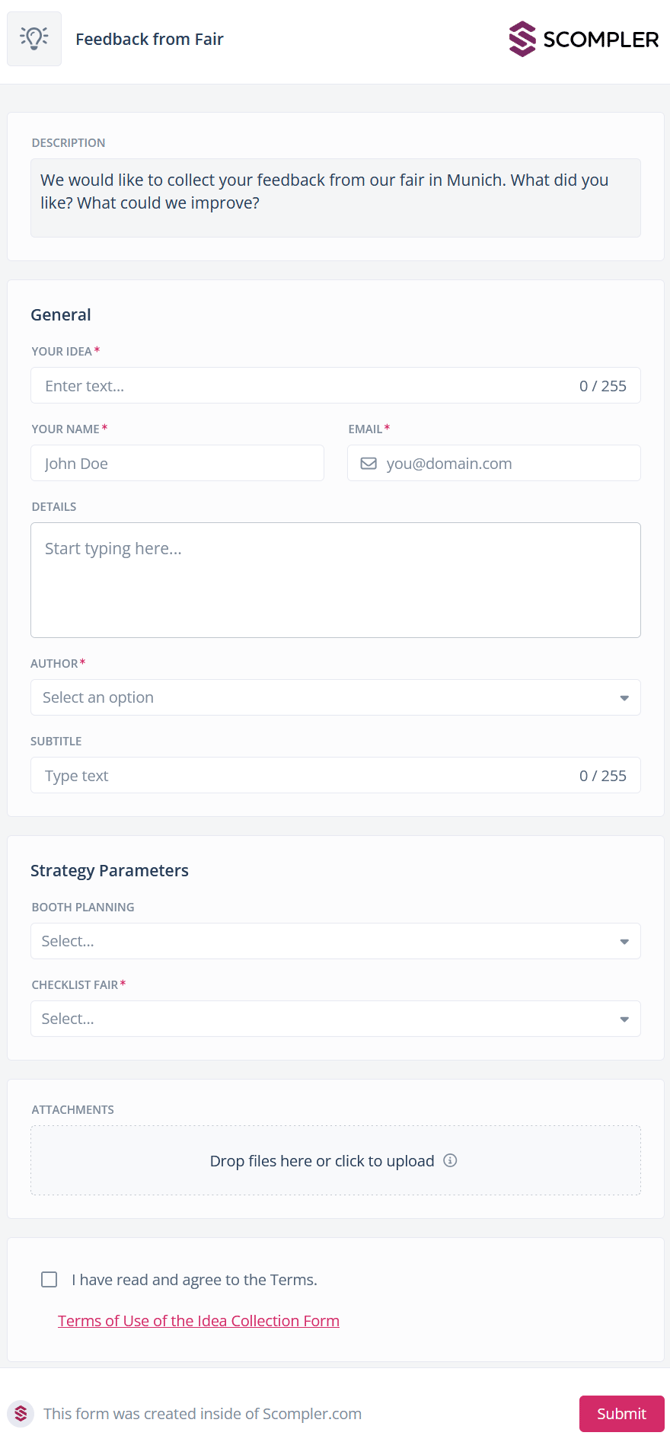
Here is what an external form looks like to the recipients:
In the info tab in the article card of the submitted external idea, you can always see who submitted the idea and contact the person using his/her email address:
In the settings for the topics and content view, you can add two more columns under “Stories Columns” and “Articles Columns” in the “Properties” category, which show the name and email address of the submitter:
