
Adapt the content types to your needs
In the left-hand navigation menu under "Strategy" you will find a menu item "Content types". Here you will already find a selection of the most common article types:
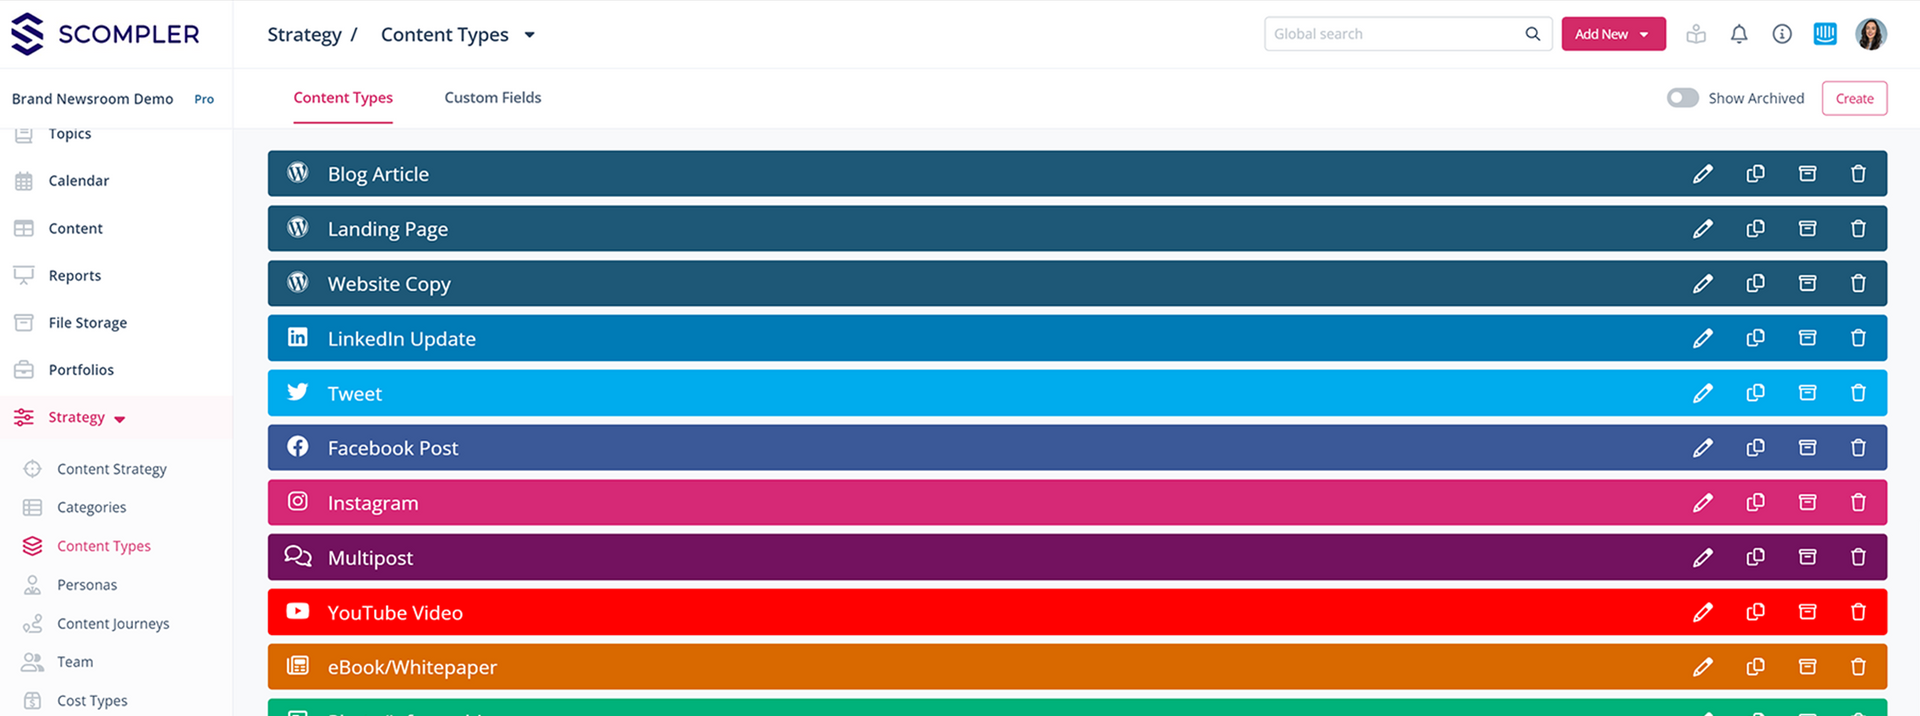
You can take this list as a basis and adapt it exactly to your needs.
Reorder the list
Change the order of the displayed content types by dragging and dropping. The order defined here determines the order in which the content types will be displayed throughout the system. Therefore, it makes sense to place the most frequently used types at the top of the list to make it easier to select them later.

Creating a new content type or editing an existing one
You can edit, duplicate, archive or delete a content type by clicking on the corresponding icon to the right of each content type. Archived content types can be displayed using the "Show archived" button. Select the pencil icon to customise an existing content type or select "Create" in the top right corner to create a new one.
You will be taken to a new page where you can set the properties for your content type:

- Name your content type as clearly as possible an select an icon that represents the content type.
- Select a target system from the ones offered. Your selection will determine the type and presentation of the content to best suit the selected channel. Selecting several social networks creates a multipost.
NOTE:
- Selecting "Blogpost" in the content type settings signals to the linked CMS that this is an article (in WordPress).
- If you select "Website", the content will be classified as a PAGE (in WordPress).
- Choose a predefined colour or create your custom colour palette.
- Add a description.
- Here you can set a story to automatically assign articles to this story whenever articles of this content type are created or imported.
- Only available for PRO licence - Decide which workflow best suits the content type. Activating the "Content Master" checkbox ensures that this content type is always displayed at the top of the list of your articles in the story.
- In the "Settings" section, determine which content the content type will be used for. If you do not select a network, the default rich text editor will be used.
- After selecting a social network, a channel selection appears. Imported articles from the channels selected here are automatically assigned to these content types.
Blogpost and website's example:

To display a preview of your attachments (images, documents or links) above the text editor in the article tab, select the relevant option here.
Heads- up for the PRO licence: In the "Custom fields" tab, you can assign or create custom fields to articles of this content type, which then appear in the Extra tab, Info tab or in the article subtab of the articles. Find out more here.
The "Manual performance" tab allows you to link metrics to articles of these content types. These will then appear in the "Analytics" tab of the article card. Find out more here.
If you would like to add strategy attributes, a predefined team, predefined costs, manual performance or individual fields to the content type you have created, first save the new content type. Then click on the pencil icon to edit the content type. You will now see additional tabs, which you can learn more about here.
Example of a social media article
If you have defined your content type for publication on a social media channel, the content area in the article card will be optimised accordingly. Only limited text editing functions are available, but you can directly display a preview for the selected channel to check the visuals of your post before publication.
Below you can see an example of an article card for a multipost. All linked channels are available, and you can now publish to them directly from Scompler.
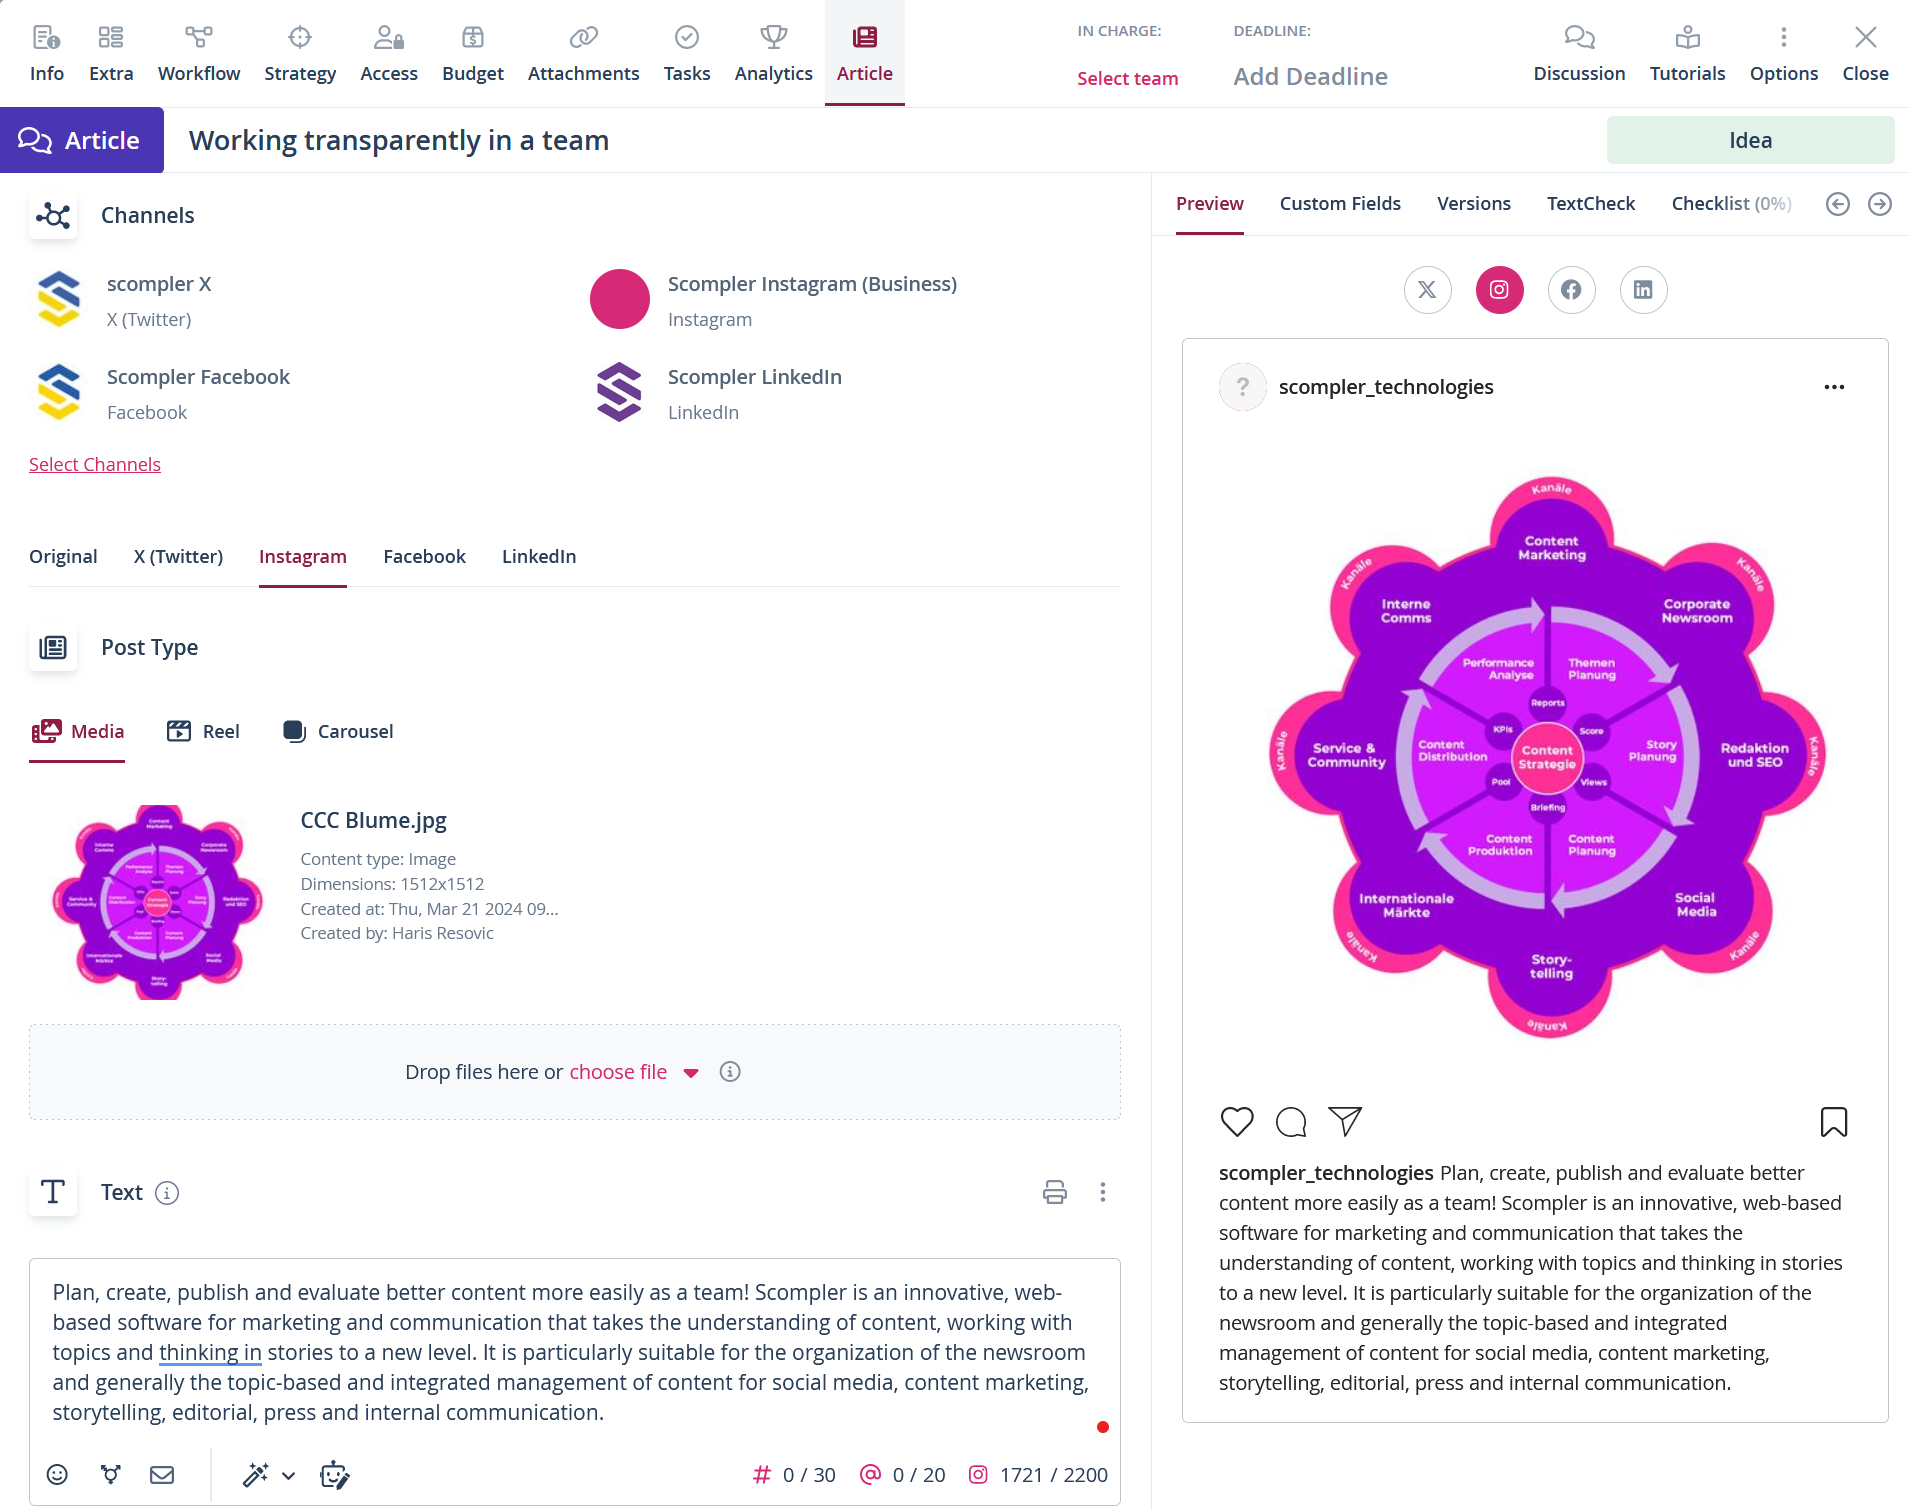
Here is an example of a multipost in which you can publish to different social media channels at the same time. Which channels are displayed to you here depends on which checkboxes you selected when setting up the content type, and, of course, which channels are connected.
Example of a blog post/website article
If you do not want to create a social media content type, select the "Other" tab and decide which options should be displayed in the article card of this content type. Advanced text editing options are available in this article card. When selecting as a website or blog post and the corresponding integration of your content management system (CMS), you can export your draft text and images directly as a draft to your CMS. Here's how this looks with WordPress, for example:
