How to work with the Story card
Set your stories and add all the necessary information to the story card to increase the efficiency and effectiveness of your teamwork.
The story card is an essential part of the planning process in Scompler. It is made up of several important elements that allow you to plan thoroughly while making teamwork more efficient. The card is divided into the following main areas:
Info
In the "Info" section there are several categories that are important for planning your activities. On the left-hand side you will find the settings, and the description on the right-hand side:
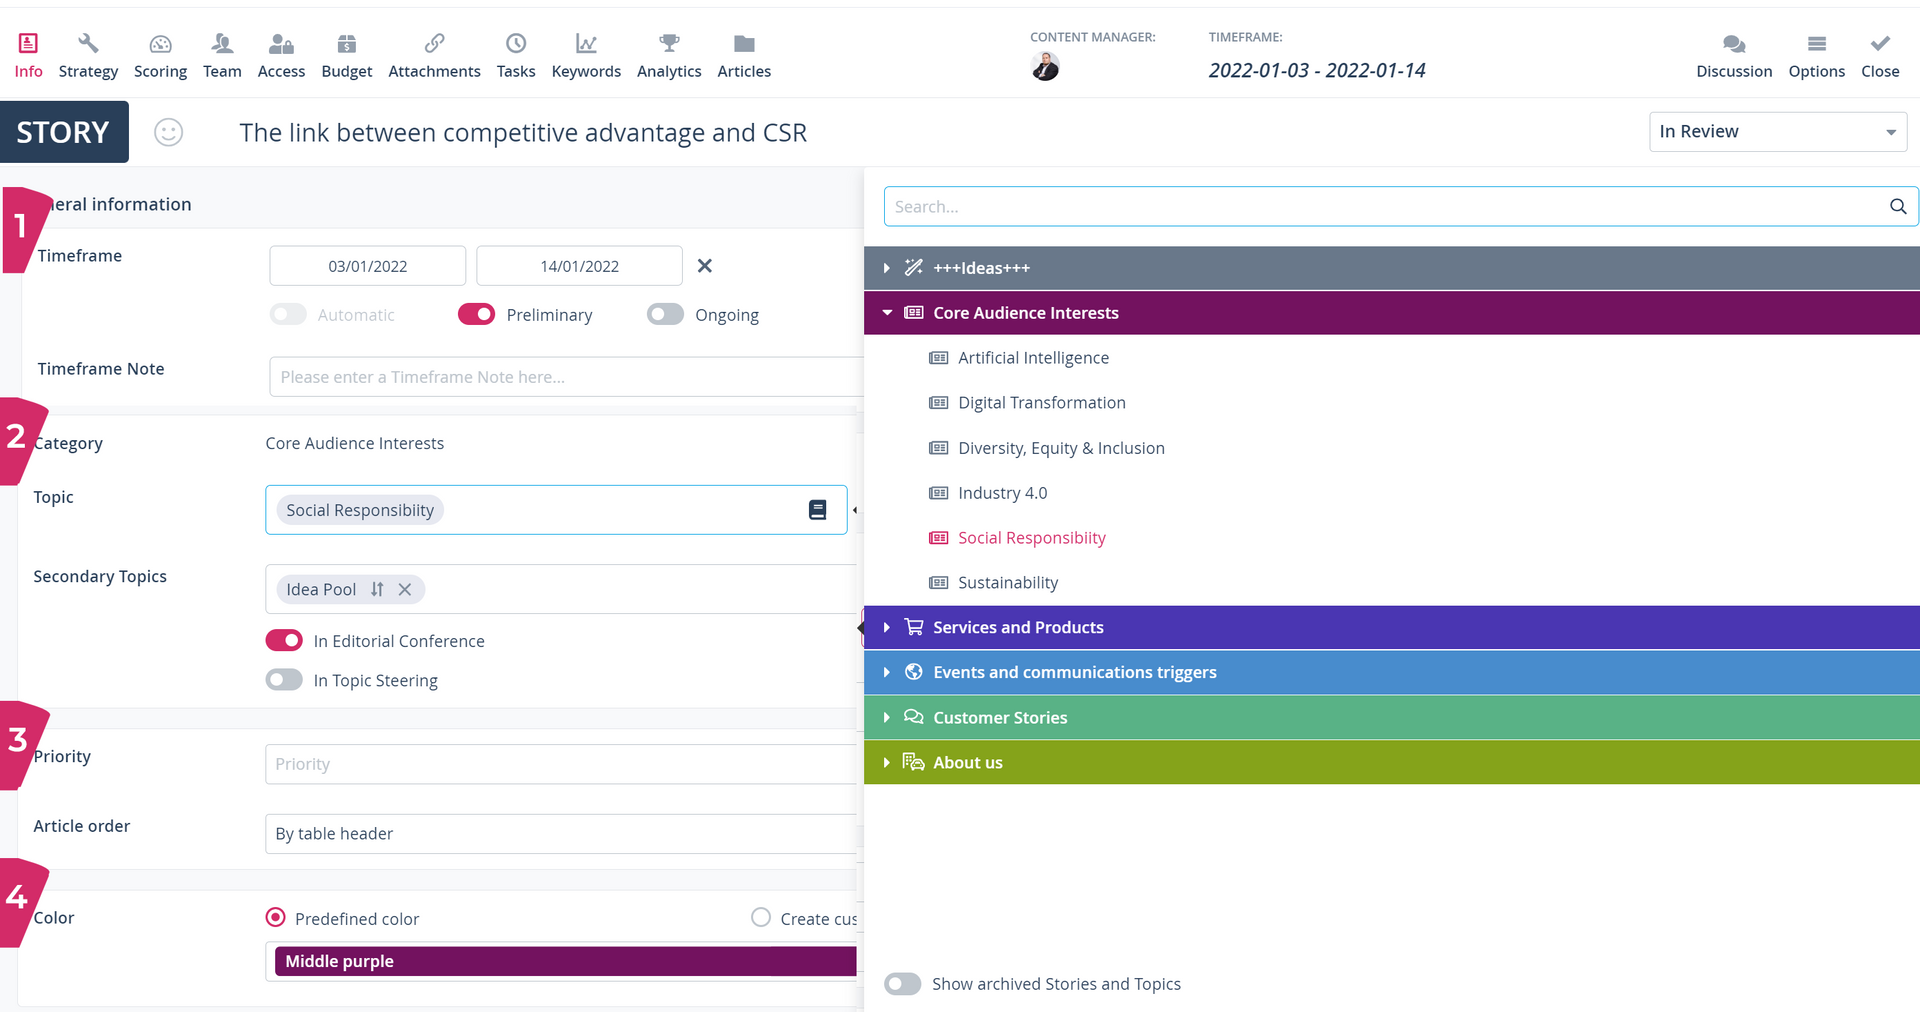
- Timeframe: Here, you can set the timeframe in which the story will be scheduled. If necessary, you can activate the buttons below the date selection and work with the data options.
- Category: Shows the topic to which the story belongs.
Topic: You can relocate the story to another topic by clicking the checkbox. Your topic structure will be opened on the right-hand side. Here, you can open the topic fields and select the topic to which you want to move the story. Click on "Open" to open the topic card that contains the respective story.
Secondary topics: Secondary topics allow you to add your story to other topics if, for example, it has a complementary function. You can link as many topics as you need.
If the story should be discussed in the topic and/or editorial conference, you can activate the button at the bottom of the field. This way you can automatically link the story to the conference without having to select the topic manually.
To do this, the headings for the respective conference formats may first have to be defined by your administrators under Strategy -> Short-Cuts. - Priority: You can set the priority of the story to A - highest priority or E - lowest priority, to be able to react more quickly to date changes if necessary.
Article order: Define here how the articles of a story should be sorted. "By table header" (allows sorting at any time by clicking on the table header) or "Manually" (sets your desired sorting and saves it in the view). - Colour: Select the colour of the story to make it easier to allocate in the different views. You can choose from the standard colour list or create your own colour.

- Personas: Define the persona(s) the story is aimed at. Personas can be created under the menu "Strategy: Personas".
Content Models: Content Models are particularly well-suited to sales-related content creation, as you can assign your content directly to specific classes in your content journey or sales funnel. But, of course, the module also offers other models, such as Mirko Lange's content radar, or your own, individualised classifications. Click on the "+" symbol to add the respective content model. You can create, customise and manage them under the menu "Content Models" in the strategy area. - Creation: At the bottom of the story card you can see who created the story and when.
- Thumbnail & Description: On the right-hand side of the card you can add a thumbnail and a description or additional information about the story. You can add links, format the text as you wish and use the @-mentions to link to people, documents and content in Scompler.
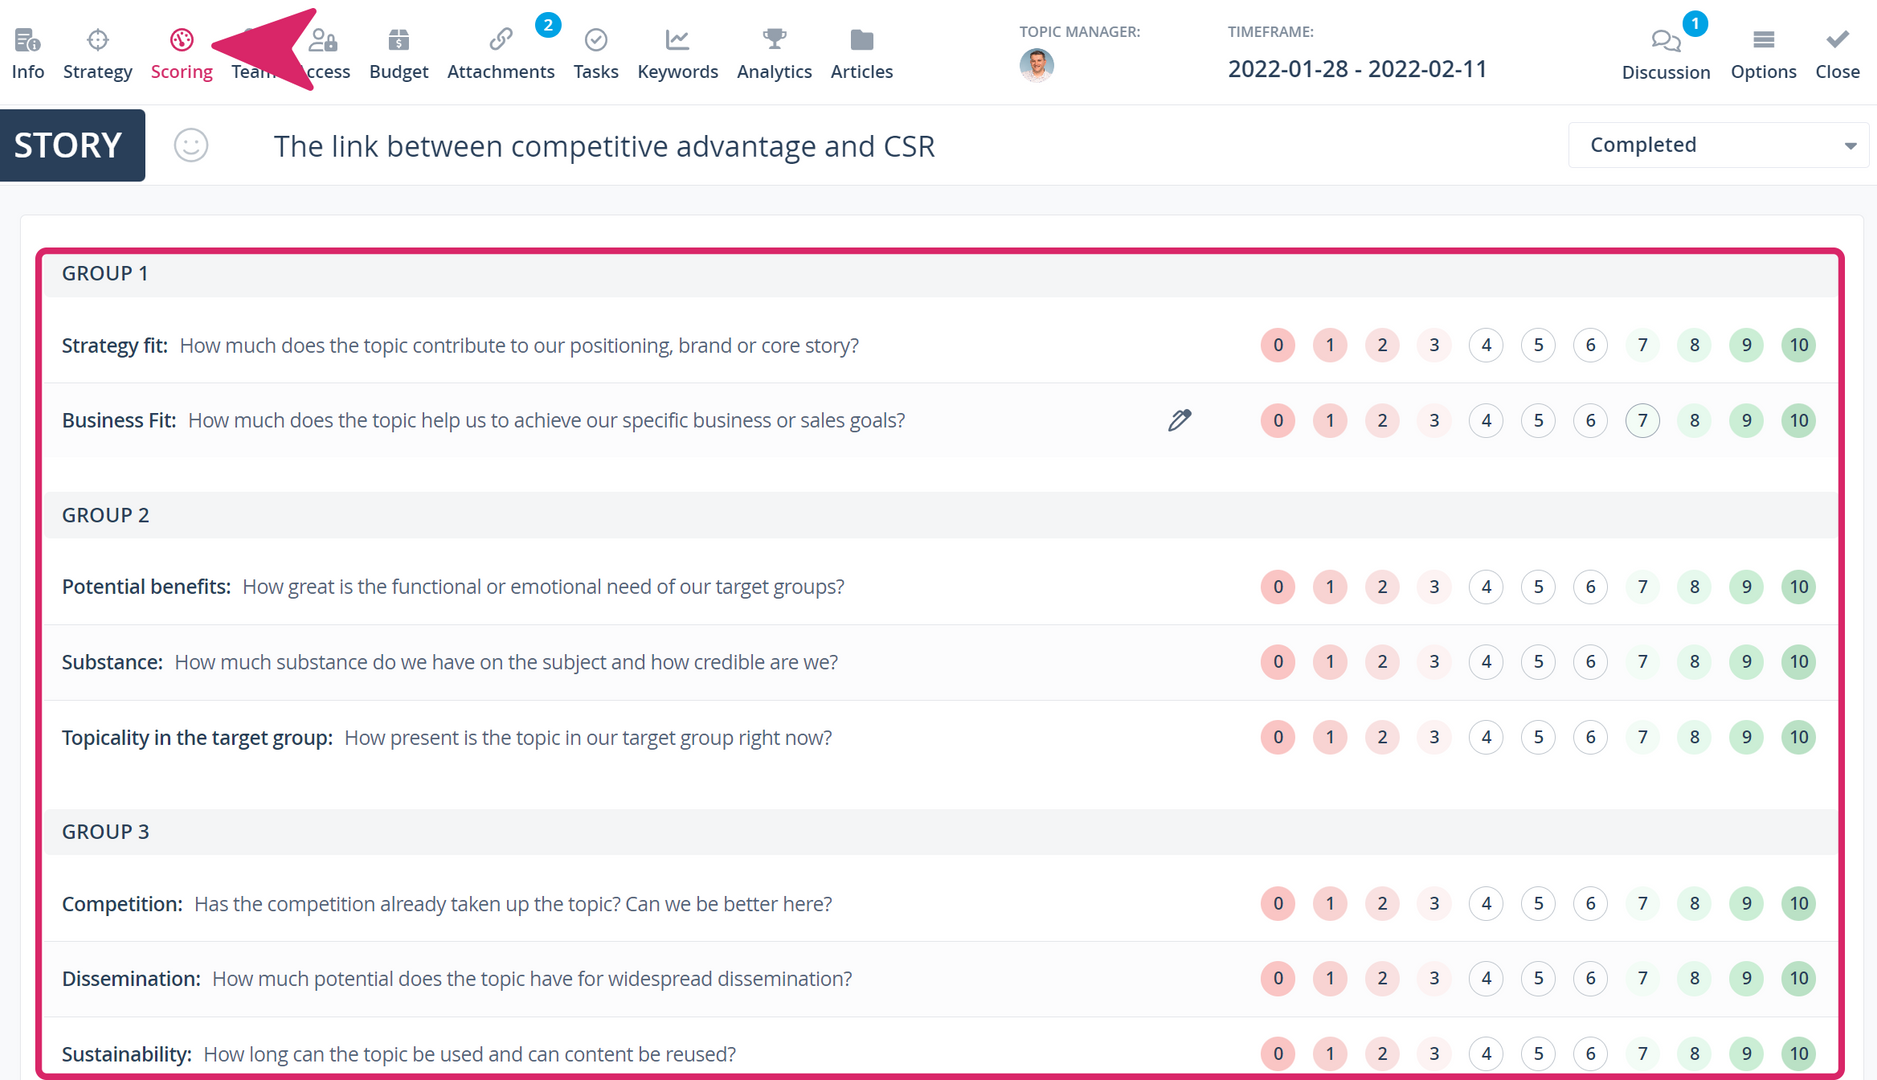
Topic Scoring
Set up and customise the integrated Topic Scoring in your project to evaluate the themes for your corporate communication together with your team.
Tasks
Create tasks to help you and your team better coordinate your campaigns. You can review, edit and complete tasks by referring to the story cards.
To create a new task, click on "Create task". Then enter the name of the task, the person responsible and the deadline and click save. You can add material or information necessary for completing the task by opening the card.
If necessary, you can also create private tasks that are only accessible to you. Simply activate the "Private" button.
Articles
On this page, you will find all the articles that are included in the respective story. You can create new articles from here by clicking on "Create article". Click on "Content-type" to display the options menu. Select a content type, enter the name and deadline and click on "Save".
Strategy
Under the menu item "Strategy", you can activate the corresponding parameters. You can select parameters for your communication goals and thus always keep an eye on your strategic targets.
Click on the section headings to open it and select the associated strategy options that your story should fulfil.
You can copy the attributes selected in the associated topic by clicking on "copy from topic". Select the option "overwrite from topic" to replace any parameters already selected in the story with those of the topic.
From the story card, you can transfer the parameters selected in the story directly to the articles already created in the story. With the "Overwrite" option, the current selection in the story is transferred to all articles and, where necessary, differing options will be replaced. However, you can also add the options selected in the story to the existing parameters in the articles by clicking on "Add".
Team
In the "Team" tab, you can define the roles of every member of your team to assign responsibilities. You can assign roles for the story to manage the implementation process.
Select an individual, several people or a whole team for each role displayed in the story card by clicking on "Select team" and selecting the desired people from the list. You can create and predefine these roles in the "Strategy": "Team" section.
You can also copy the existing settings from the topic card to which the story belongs. Click on "Copy from topic" and the corresponding fields will be filled in automatically. If you wish, you can automatically transfer this allocation to all articles included in the story by clicking on "Assign to all articles".
In the input field "Other", you can enter comments or notes about people who are important for the execution of the story but are not registered in Scompler.
Tip: In each area of the story card you can change the story manager by clicking on "Select team" at the top or on the picture of the current topic manager.
Discussion
From any area of the story card, click on the “Discussion” icon to access the history of conversations or comments. You can make comments, add people to the discussion and use @mentions.
Click on the bell icon to follow the discussion and receive notifications when someone makes comments.
Attachments
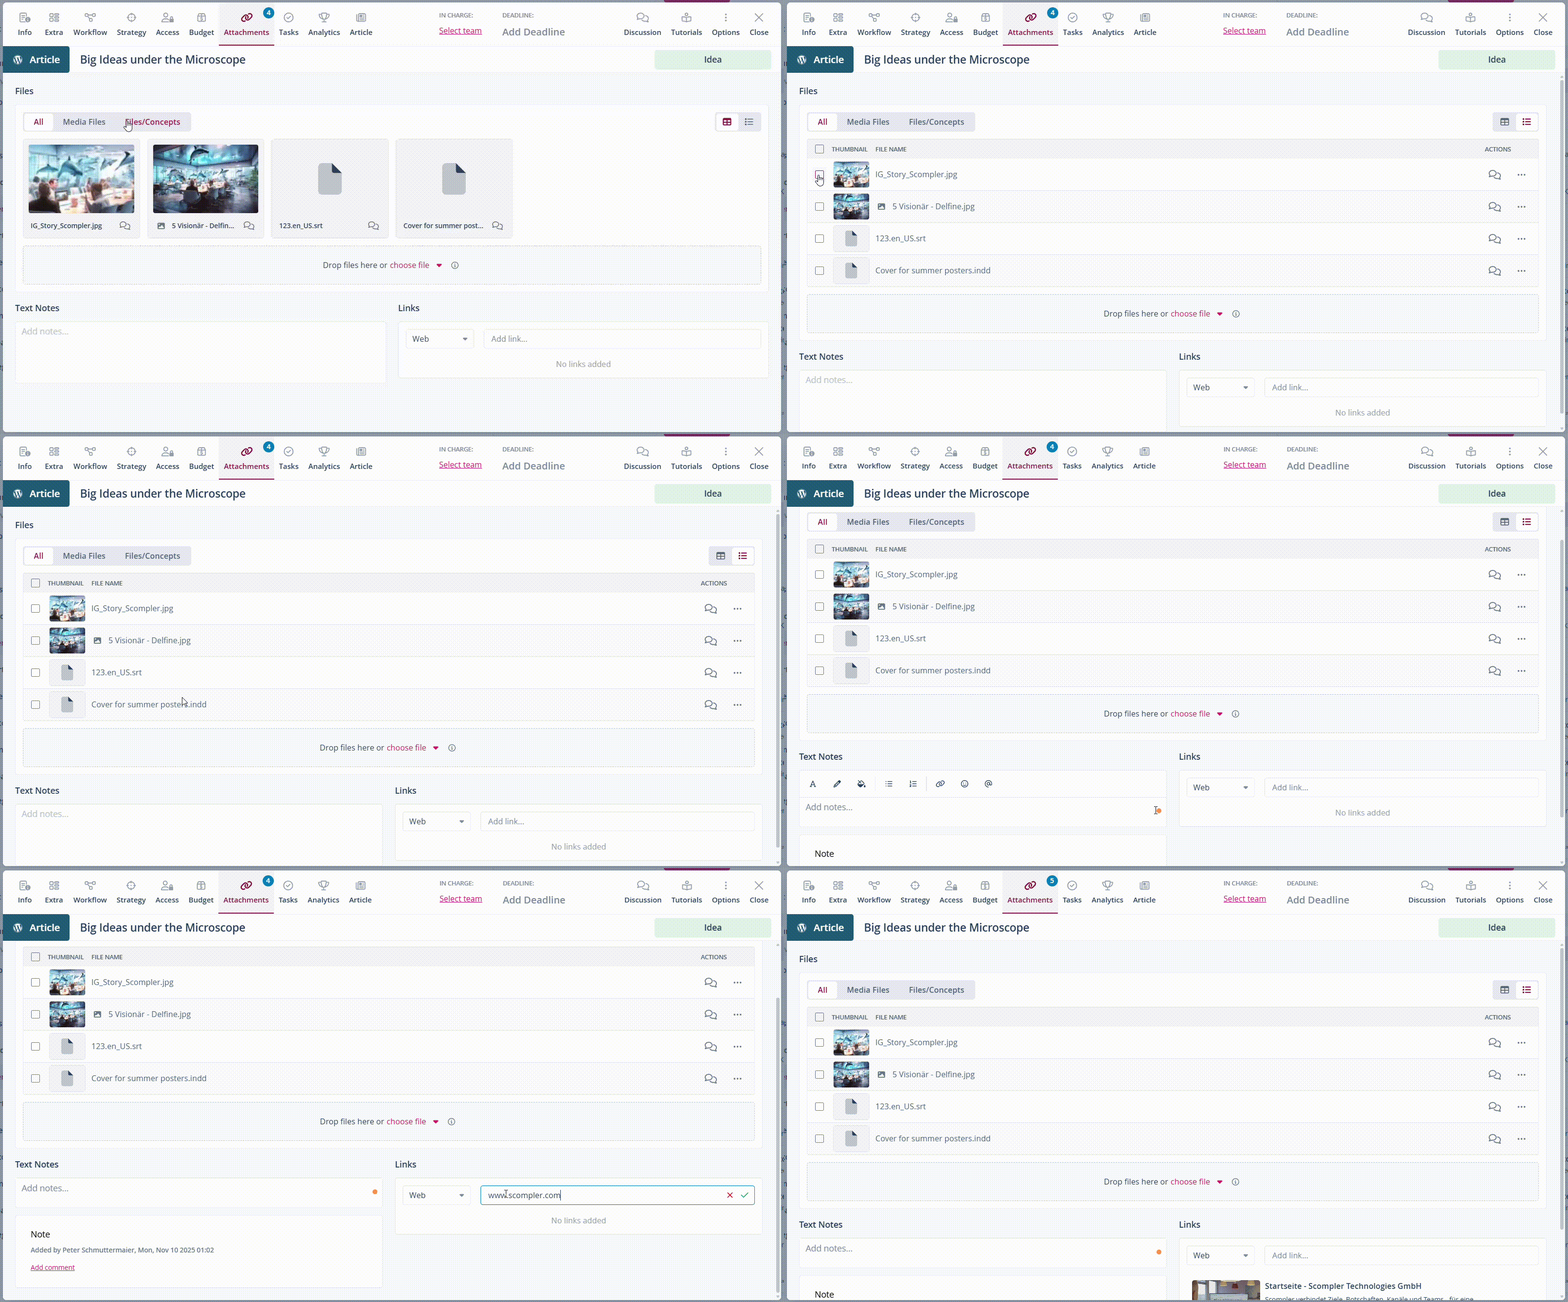
Here, you will find the necessary information and audio-visual resources for planning your story. This way, the whole team has access to the necessary information, making the day-to-day work more efficient.
From here, you can decide whether the material relates only to the story or also to the topic in general. Click on the “Story” tab to upload the material only to the story, or on ‘Topic’ to also upload the material to the topic card (if you upload the information to the “Topic” tab, the material will be displayed on all story cards contained in the respective topic). You can upload photos, videos, and documents, and choose between tile and list view.
Clicking on the “speech bubble icon” opens the discussion sidebar, where the relevant media can be discussed directly in the attachments tab.
If several files are selected, they can be deleted or downloaded simultaneously using a bulk edit menu that appears at the bottom.
You can also add links and leave notes if necessary, which can be commented on by others.
Access
In this section, you can control who has access to the story, either for confidentiality reasons or because external users are working with your team on content production. Click “All” to view the options:
Select “All” to allow all users, including external users, access to the story and its content.
You can also restrict this access permission by clicking on the box below the selection you have just made and entering the name or email address of the person(s) to be excluded from the above selection.
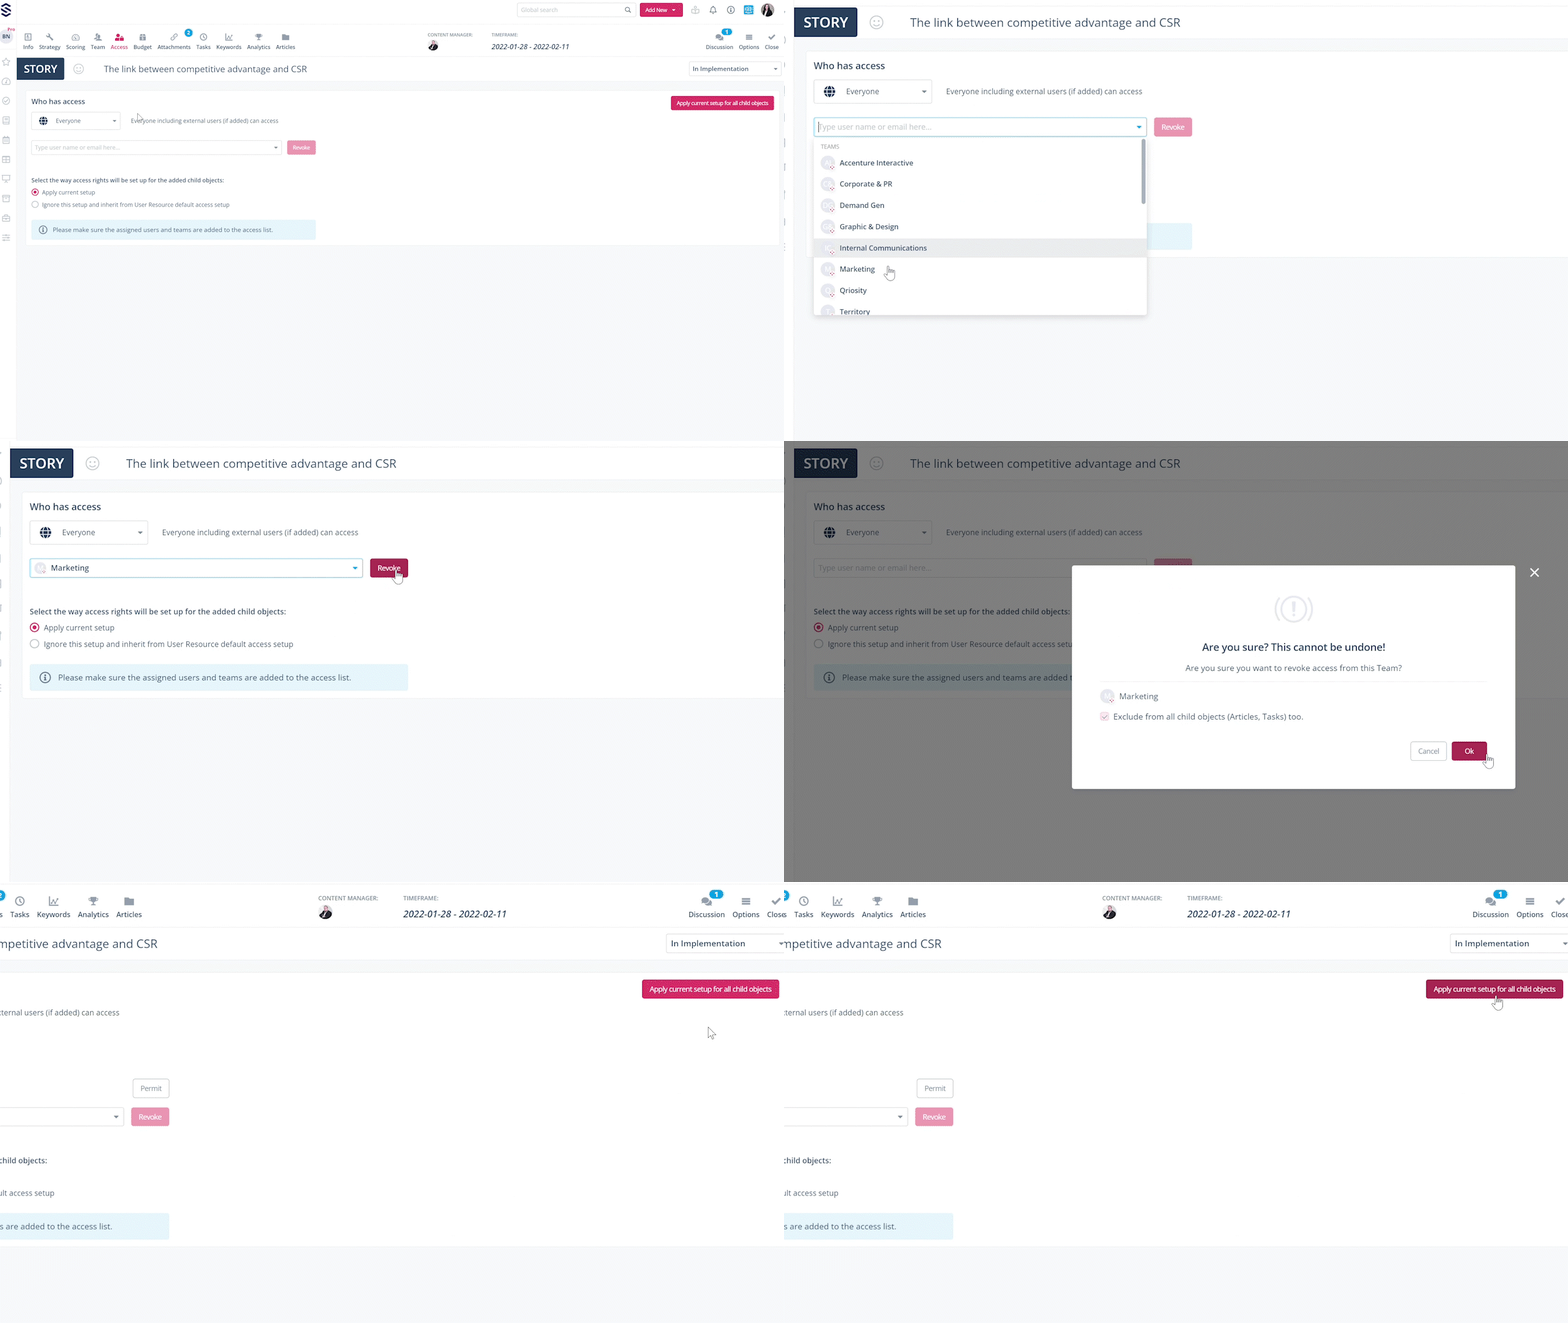
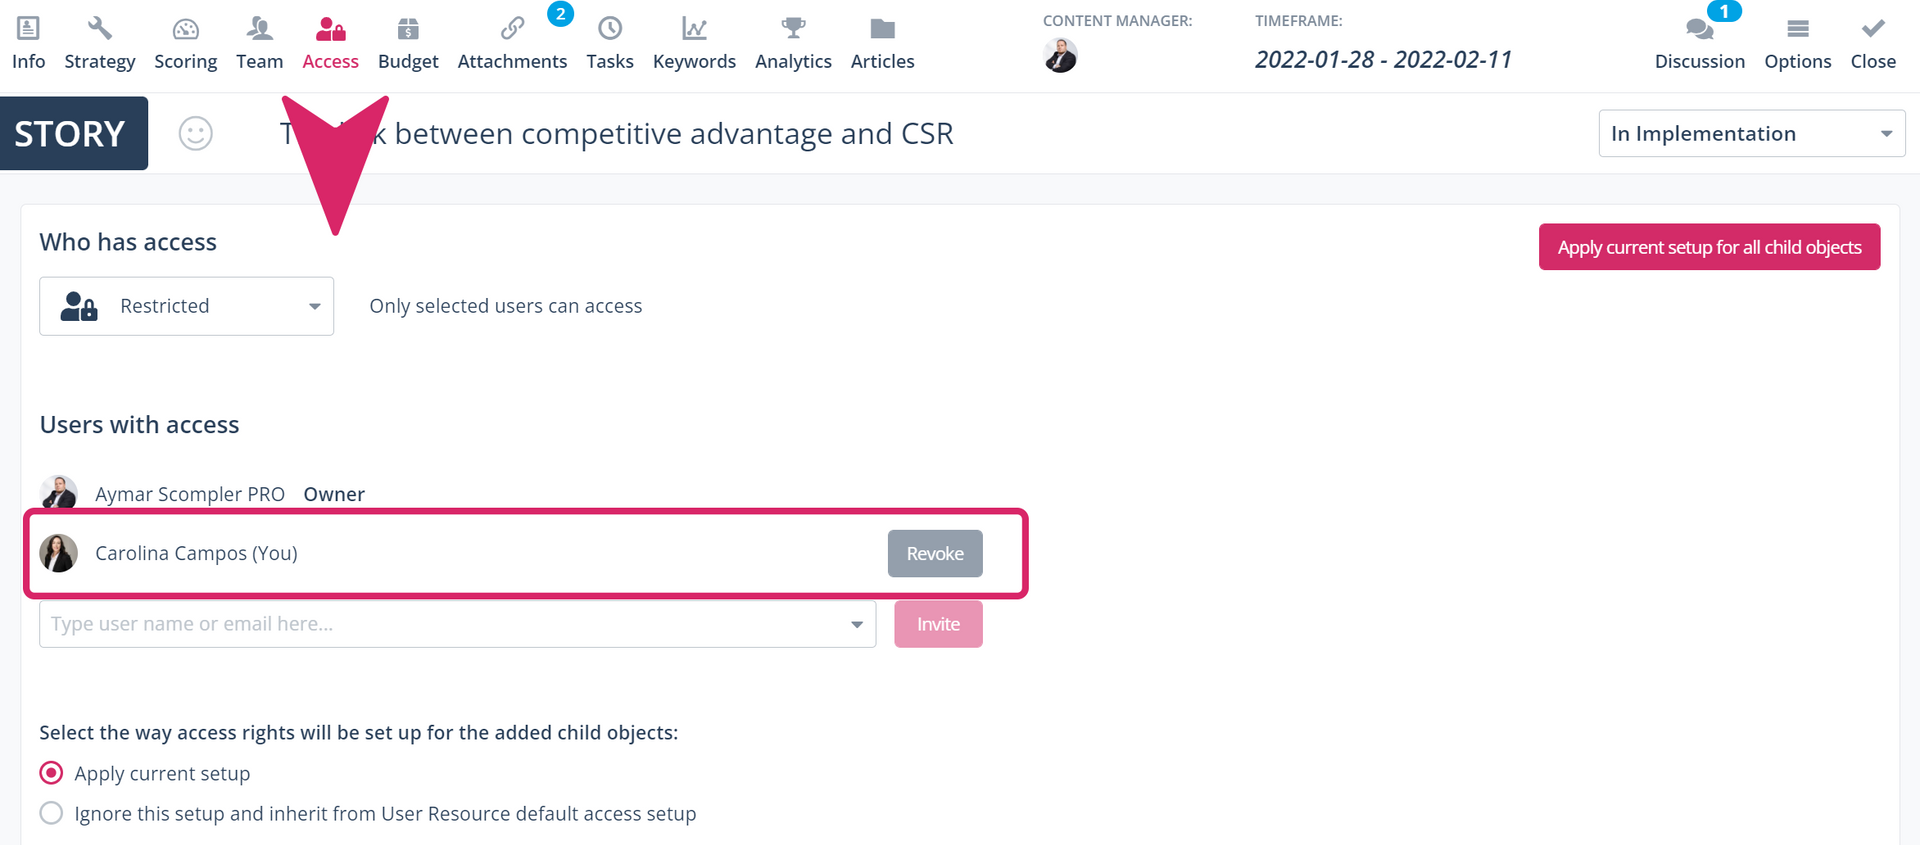
If you select the "Restricted" option, a window will open in which you can decide whether the changes you make should apply to the articles created in the Story. Above this field, you will see a list of people who currently have access to the story.
To remove access from a person in the list, click on "Exclude" to the right of their name. To add a Scompler user to the story, click on the box underneath and enter the person's name or email address. Then click on “Invite”.
Budget
Enter the total budget you have for your story, as well as the cost centre and important notes. This section is fed by the information entered in the articles.
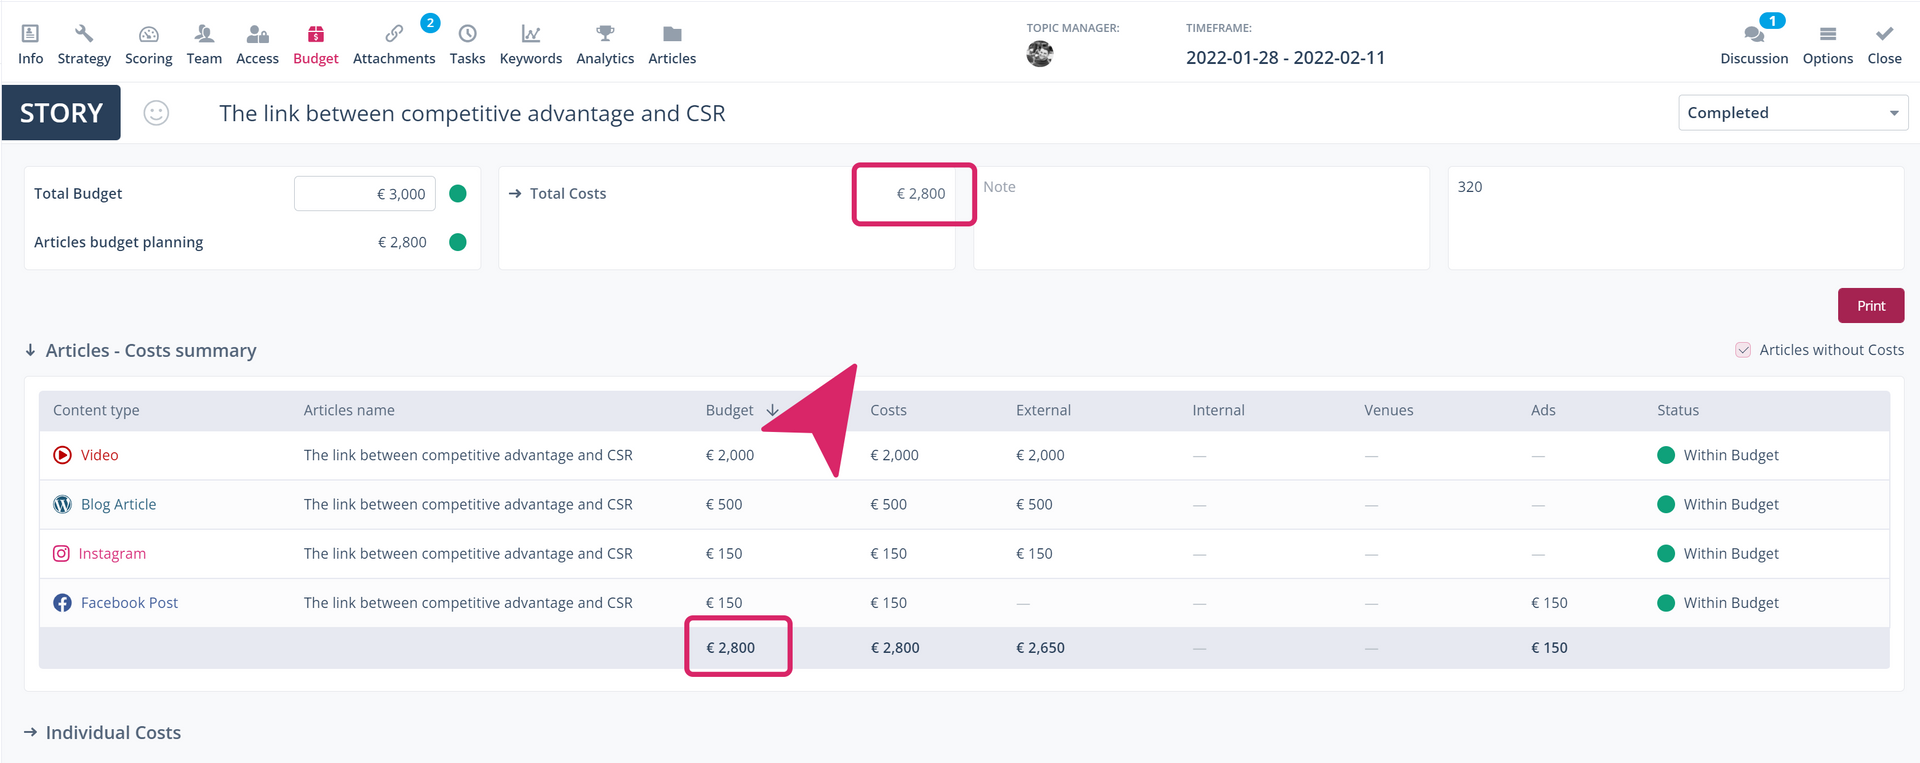
If, for example, articles from social media, blogs, ads, etc. are planned in the story, and the production costs required for each content type are entered in the “Budget” tab, this information will be displayed under “Budget” on the story card. This will help you calculate the total costs and give you better cost control when planning your activities.
Tip: Print your budget plan by clicking on "Print" to ensure that your stories are feasible and consistent with common goals.

Google trends
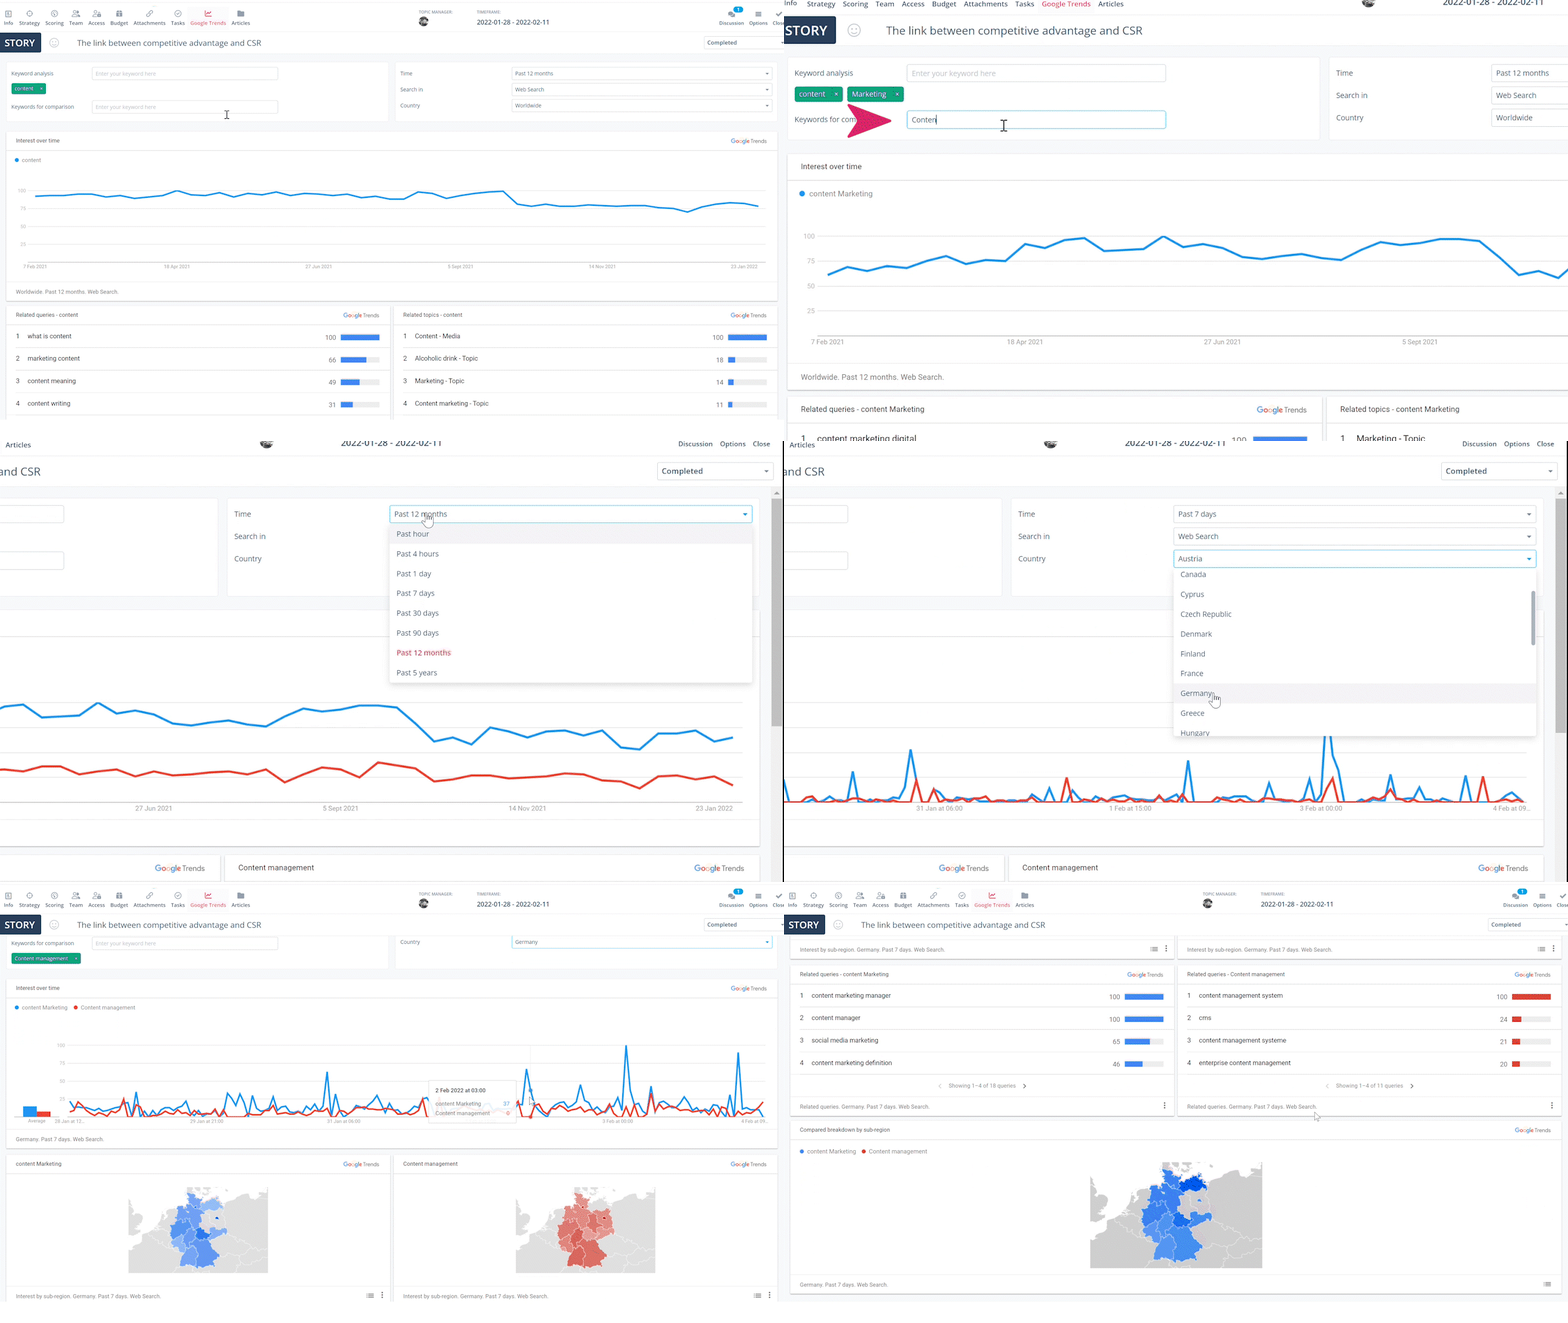
Find keywords in Google to help you with content creation. Click on the "Keywords" tab and enter the words you want to search for, as well as the time, region and location. You will see a graph showing you the performance of the word you entered.
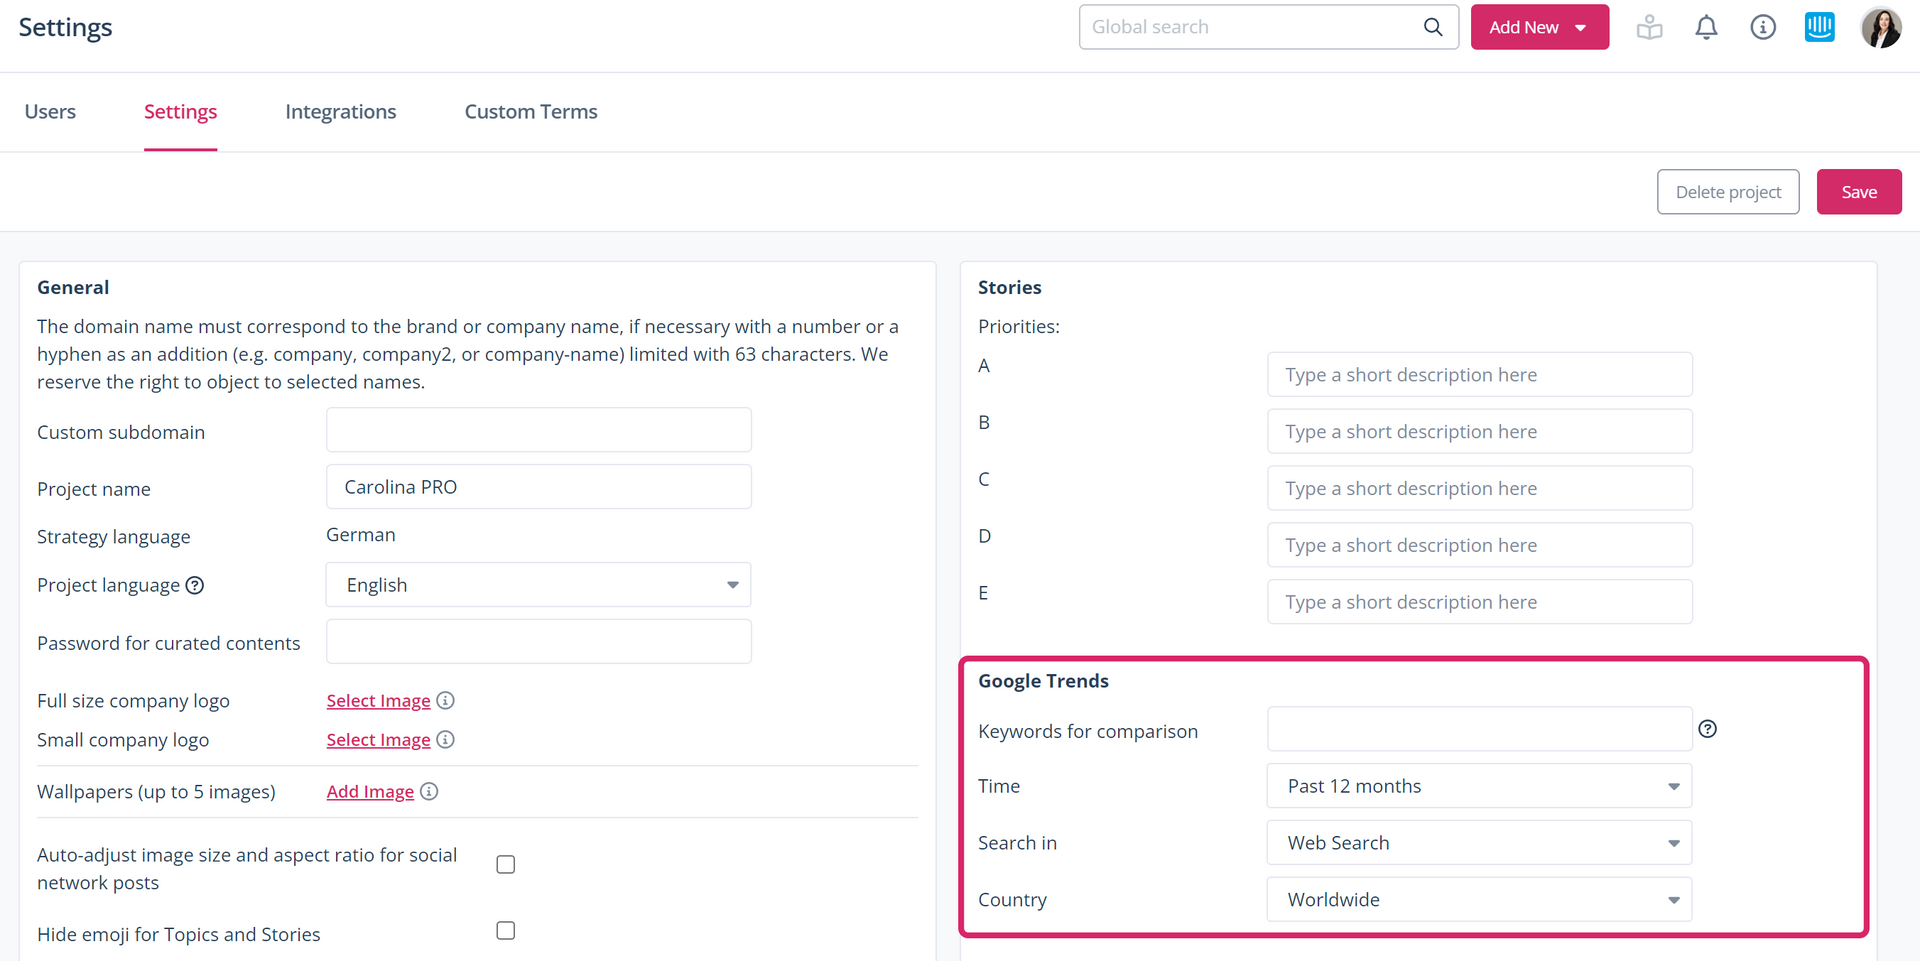
Tip for administrators: To enable this tab in the topic and story cards, this function must be activated in the desired user groups. To do this, open a user group in the project settings and activate the option "Tab: Google Trends".
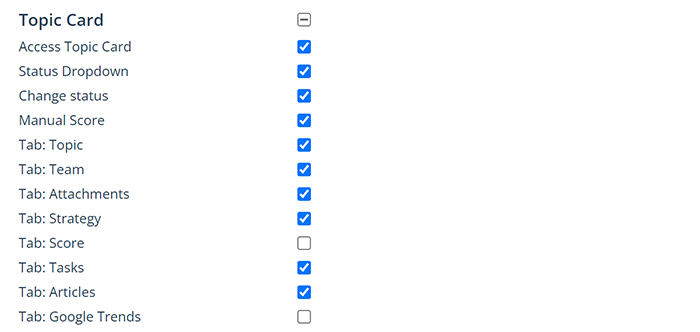
You can also customise the predefined settings for "Keywords to match", "Time", "Search in" and "Country".
You can also do a comparison between several words and see how the keyword performs in the region.
Tip: Click on Options to perform the following actions
- Show story in content area
- Show story in calendar
- Create tasks
- Print Briefing
- Copy Story ID
- Copy story URL
- Duplicate Story
- Delete Story
