
In Scompler, you can plan and publish content for your social media channels very easily and quickly. Here's how it works.
- Create a social media post
- Select the channel
- Text
- Link posts
- Images or videos
- MetaData - Targeting
- Publishing
Create your article
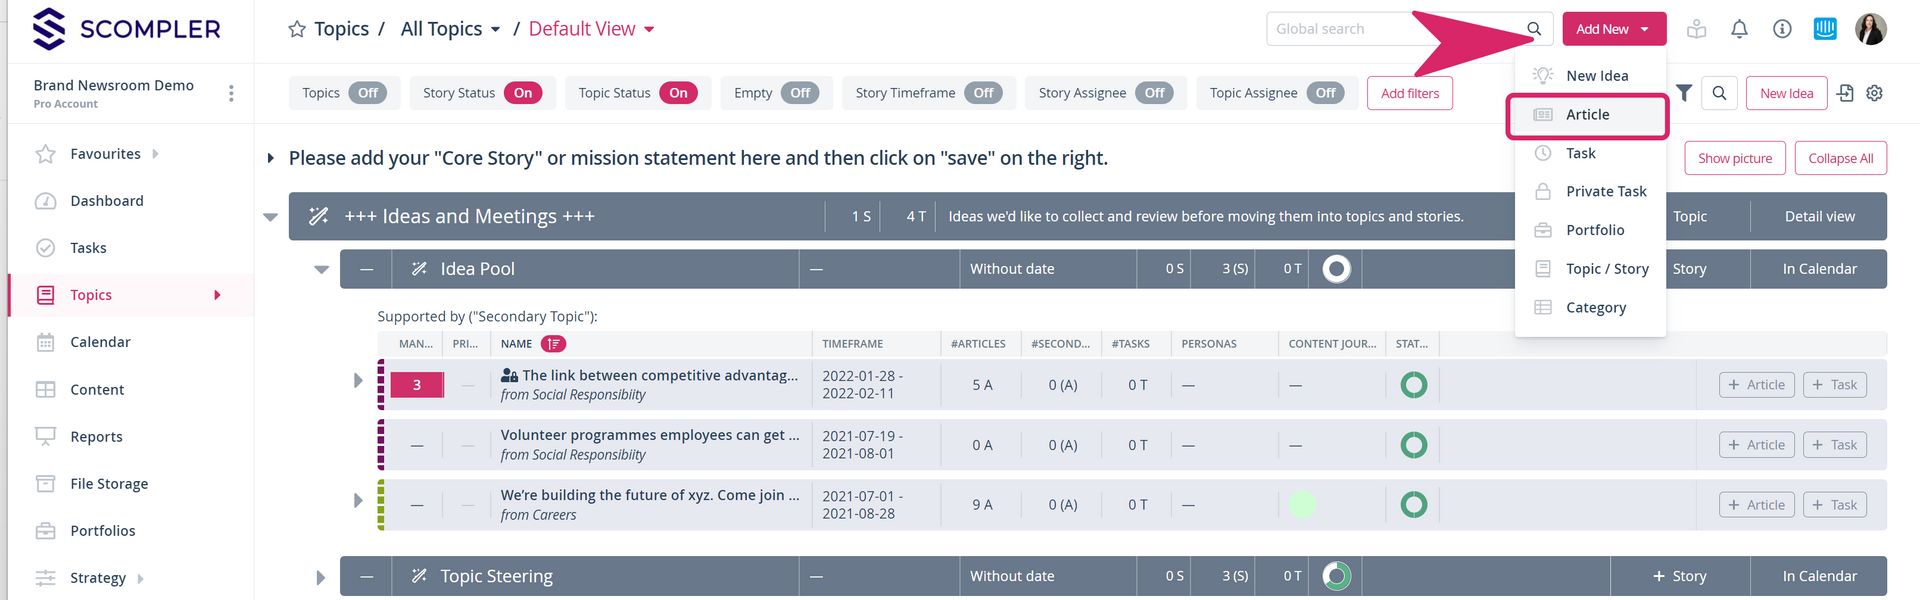
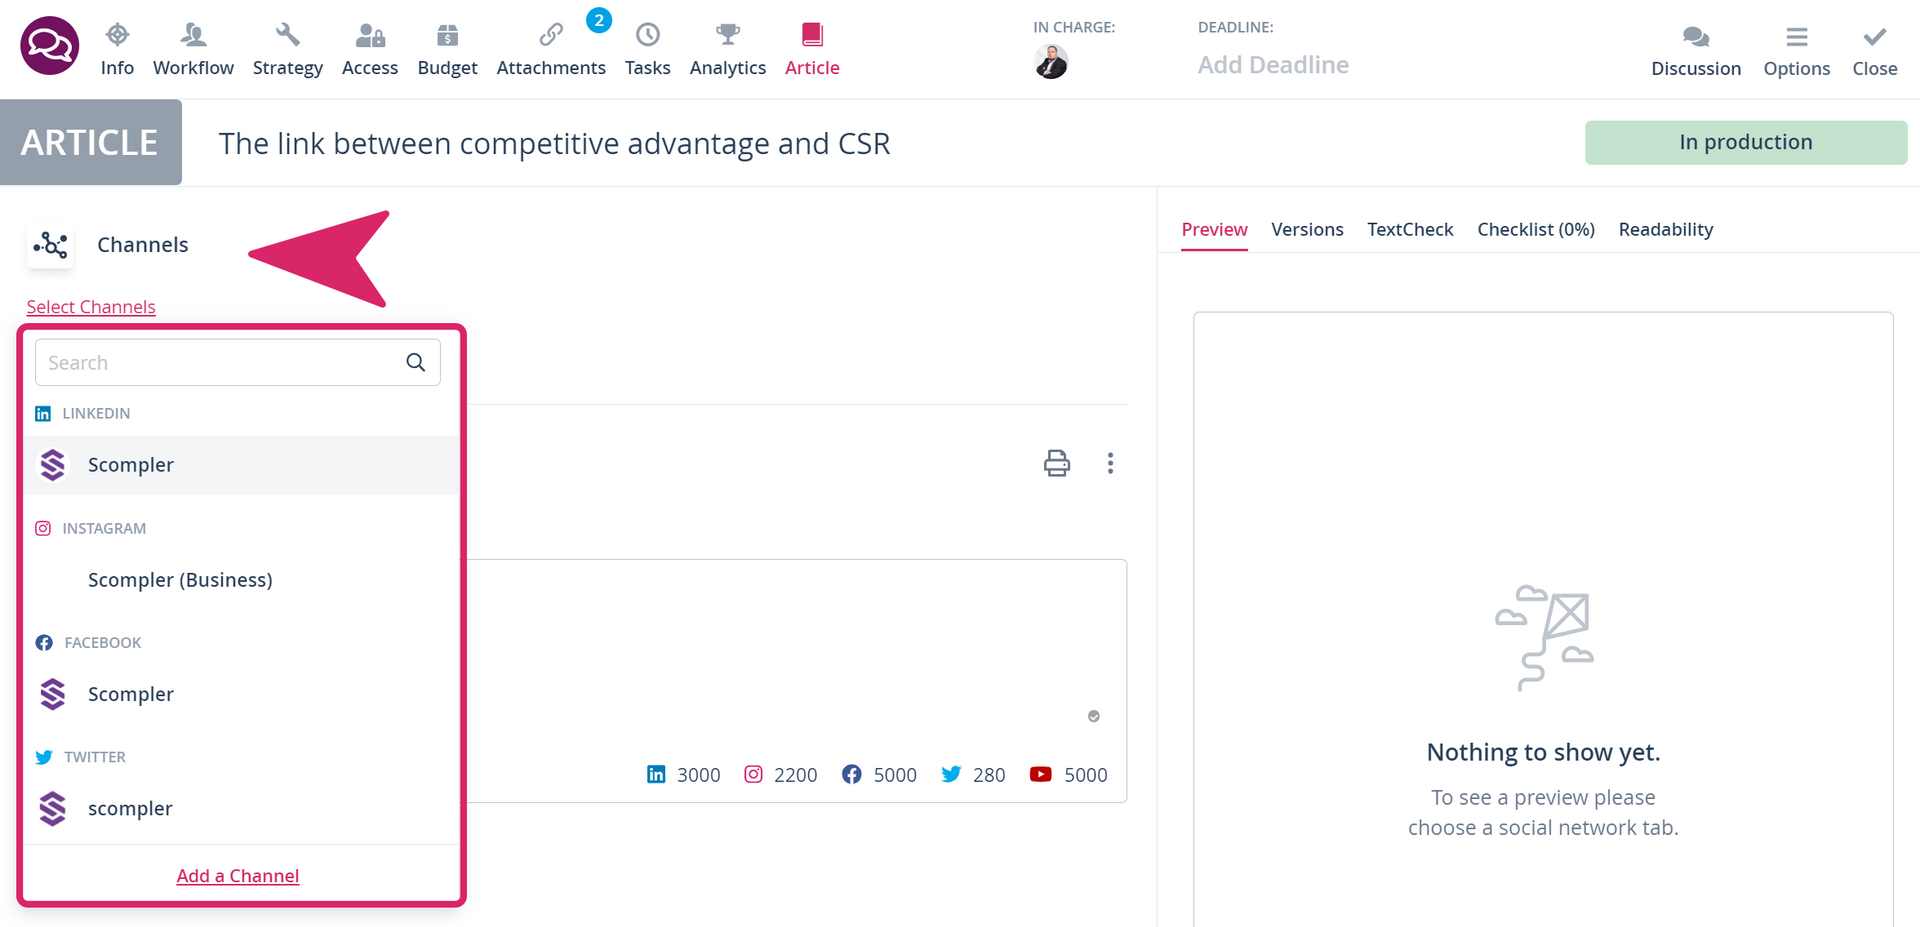
To publish articles in your social networks, you must first integrate the respective channels in Scompler. Once they are integrated, you can create an article for the required channel, for example, from the topic view within the respective story:

You can also click on "Add", then on "Article" and select the desired content type from the list: e.g. Facebook, X (Twitter) LinkedIn or Instagram. Alternatively, you can create a multipost to publish on different social networks at the same time.
Note: The creation and publication of stories on Facebook and shorts on LinkedIn from Scompler are currently not supported.
Select the channel
After you have created the article, select the integrated channel on which you want to publish in.
Add the text
You can write the text directly in the text field or copy and paste it if you have already prepared it. You can add emojis to the text by clicking on the smiley icon. Choose from many different options by scrolling or using the keyword search.
To use tags, click on "@" and enter the name of the page you want to mention. For Facebook, you will now be presented with a drop-down list. To tag on LinkedIn, a few requirements must be met.

Hashtags are generated by using the # symbol. Hashtags and mentions are displayed in a different colour to make them stand out in the text. The mention function is not available for Linkedin posts.
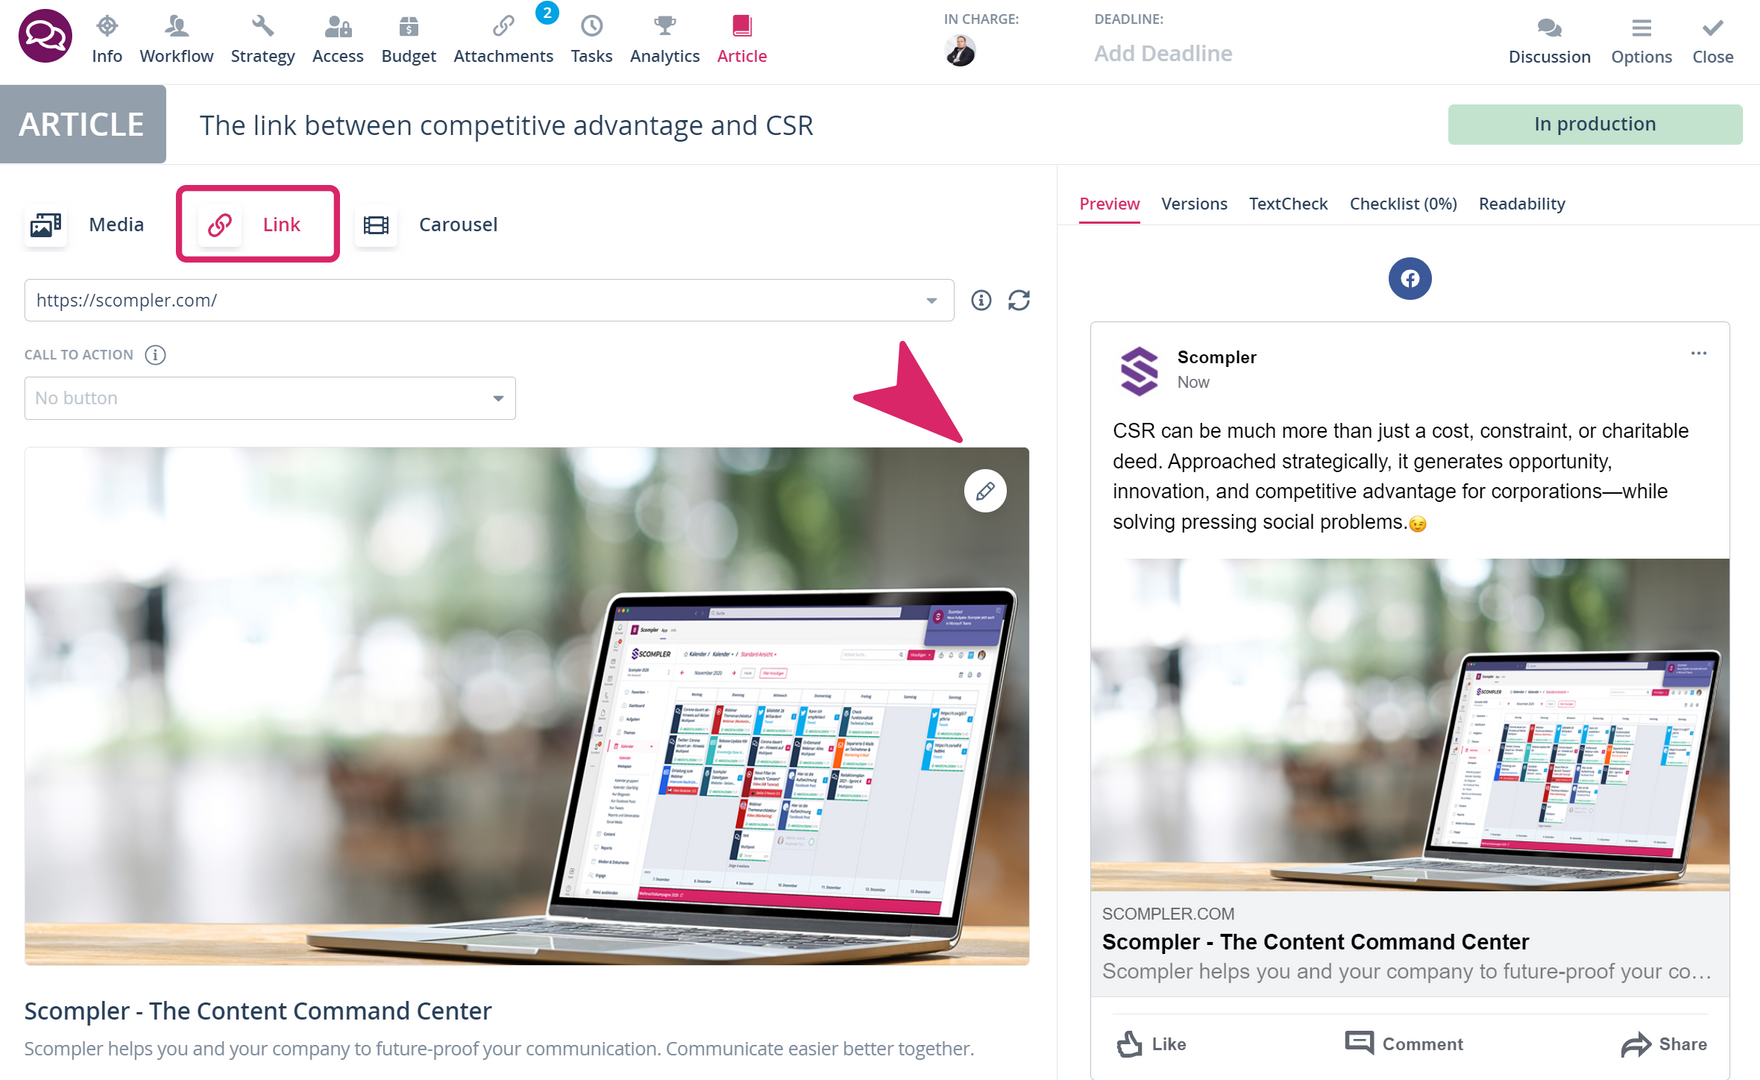
Create link posts
Note: This feature is available for Facebook, Linkedin and X.
Adding links to an article is very easy. Click on the "Link" tab and directly below you will see a drop down menu for entering the link you need. You can also paste it directly into the text and shorten it with the link generator by clicking on the three dots at the top right of the text area. The link will be previewed and clickable.

For LinkedIn and Facebook posts, it is possible to edit the preview image, headline and description for your own verified domains. To do this, place the mouse pointer on the image and click on the pencil icon that appears at the top right. Do the same on the caption to edit it.
Note: Facebook Carousel
With the Facebook Carousel you can add two or more images, descriptions, headlines and links or calls-to-action in a link post.
Add images or videos
To add images to your post, click "click to upload" if you want to upload them, choose "select from material" if the images are already in the "Attachments" menu, or "search file" if the images are in Scompler's database. Edit the images and adapt them to the social media formats.

Adding videos works in the same way as adding images. When you've added the video you want, you can upload a thumbnail for Facebook. To do this, move the mouse pointer over the video and click on the image icon at the top of the video. Then click on "Upload image" or "Search file" and the image will be loaded as a thumbnail. The recommended video thumbnail size is 1200 x 677 px.

You can also change the order of the images
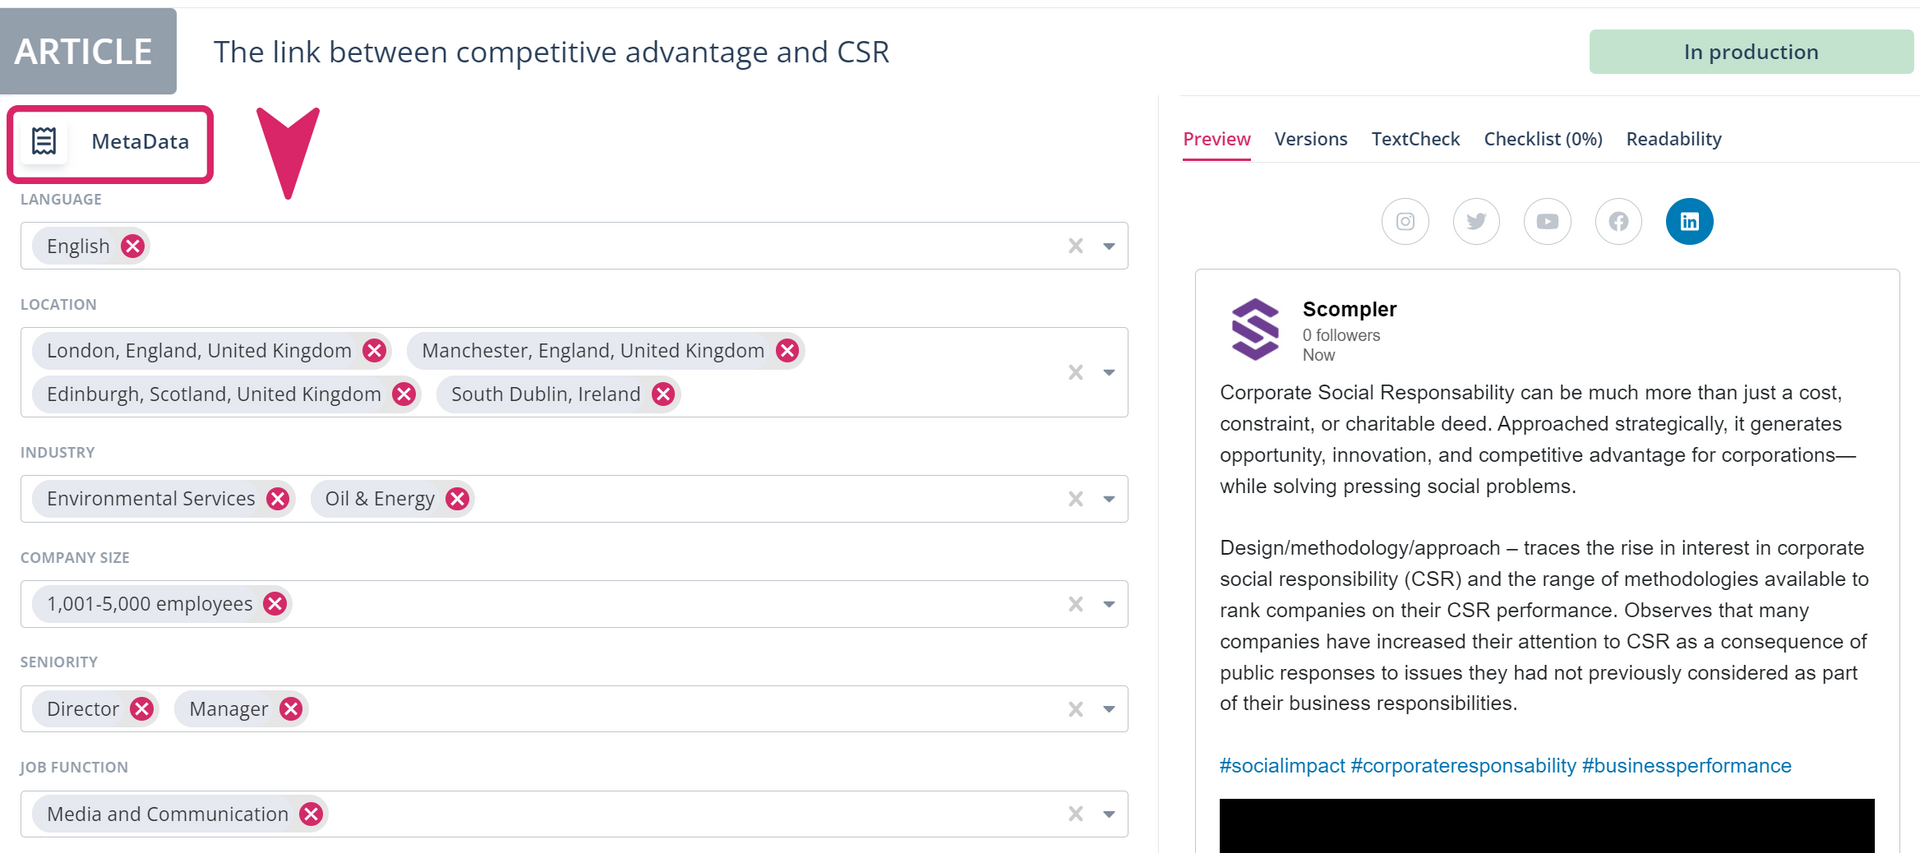
Use the MetaData - Targeting
Segment your target audience and achieve better results with your posts. For LinkedIn posts, you can set the language, industry, company size, job title and location of your target audience. For Facebook, set the location and target countries.
To do this, open the respective drop-down menu with the arrow under the "MetaData" menu item and select the desired options.
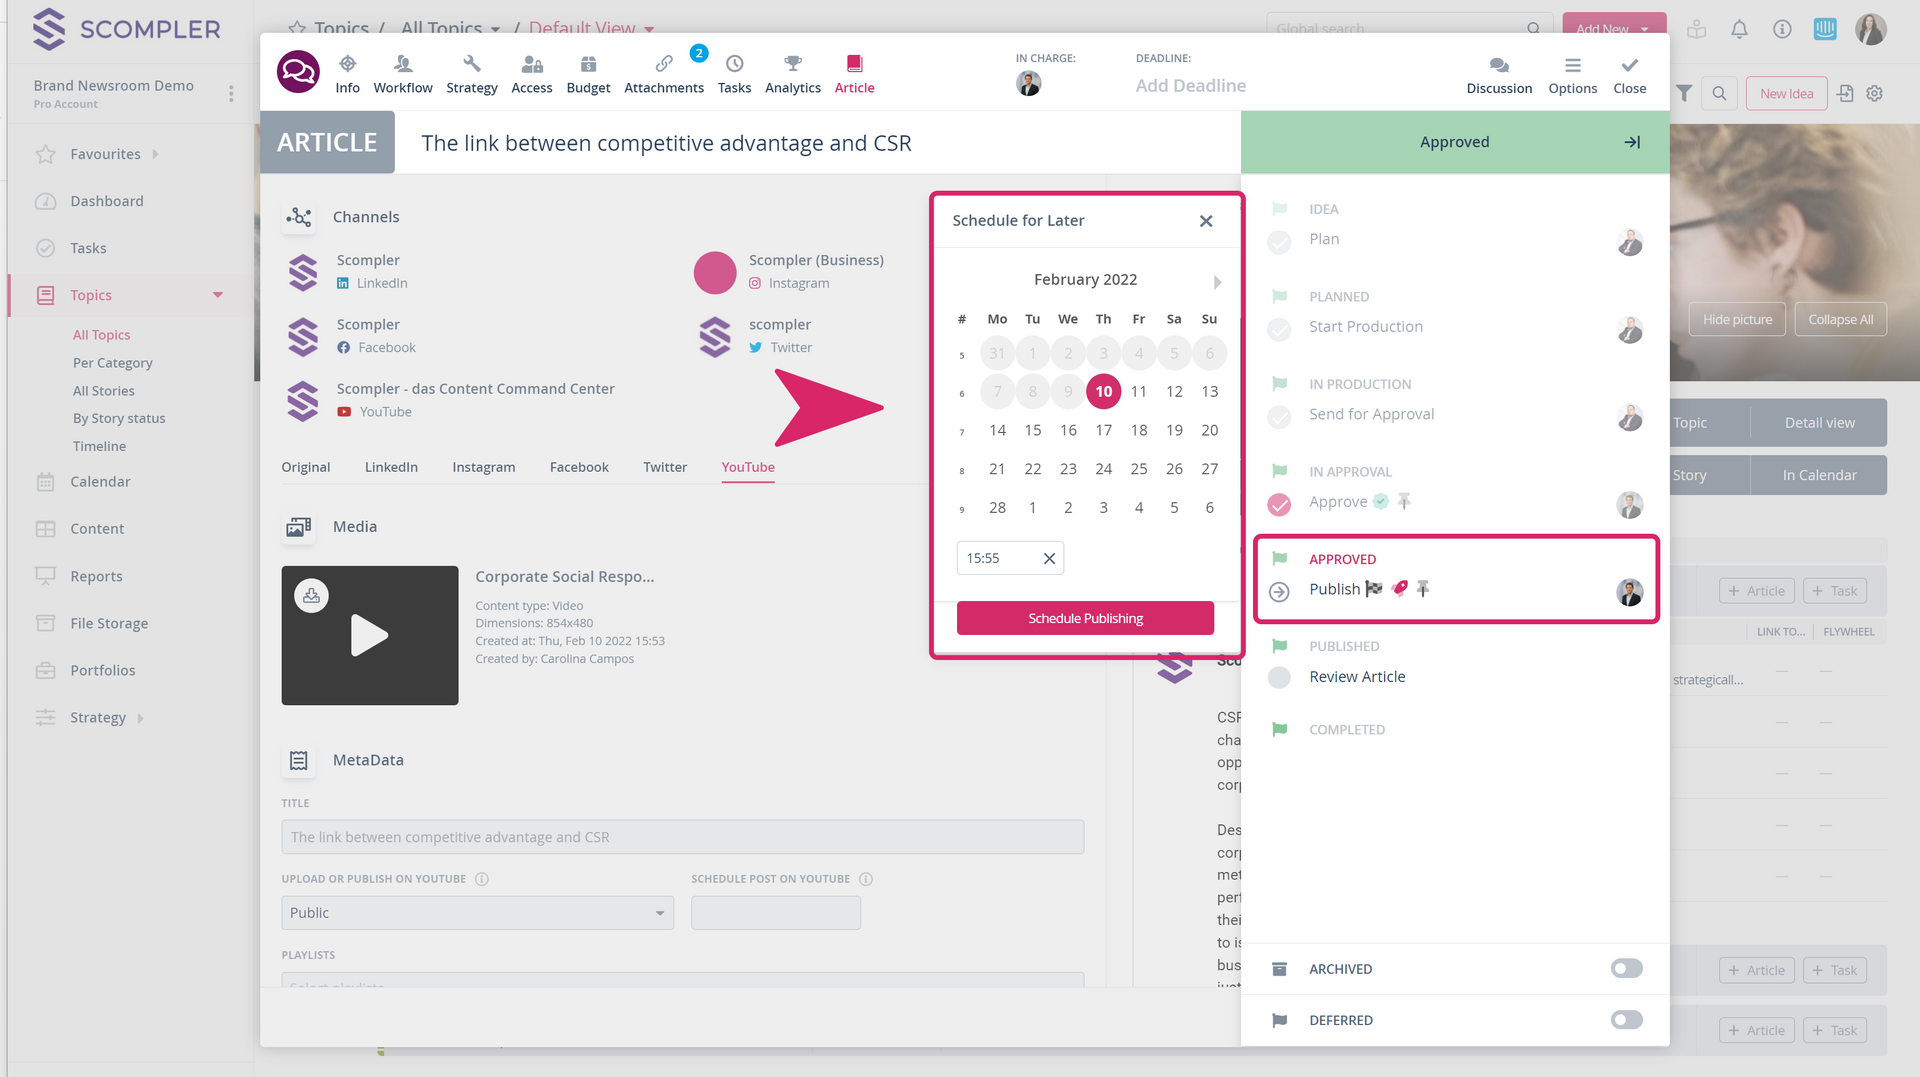
Publish your content
Once you have the text and audiovisual content ready, you can prepare the post for publication by clicking on the article status at the top right of the article card. Then follow the steps of your workflow and set the date and time of publication.
When the article is approved, confirm or correct the publication date to automatically publish the article on a scheduled basis. Alternatively, you can manually publish the article immediately, regardless of the date you set in advance.
